Skip to content
Get App

Market Mechanics Ep 25: How I Find A+ Setups

Brad Goh explains his five golden rules for identifying A+ trading setups: bias alignment, high-probability points of interest, market structure shift, liquidity, and asymmetric risk-reward.

Key Takeaways

  • Discipline in filtering trades matters more than the ability to enter trades.
  • A trade should only be taken when all criteria, including timeframe alignment, point of interest, structure shift, liquidity and risk-reward, are satisfied.
  • Beginners should stay out of the market when timeframes conflict and wait for alignment.
  • Asymmetric risk-reward is a non-negotiable requirement regardless of how good a setup looks.

What the video covers

  • The core premise: trading edge comes from filtering out B and C setups and waiting for A+ setups that meet every criterion.
  • Most account blowups stem from poor trade filtering and taking trades for action or boredom rather than from not knowing how to enter.
  • Golden rule 1 - Bias alignment: the trade direction must agree with both the lower and higher timeframe trends; conflicting timeframes call for staying out or waiting for clarity.
  • Golden rule 2 - High-probability point of interest: supply and demand zones, order blocks or flip zones that price is likely to respect, ideally aligned with the immediate trend.
  • Stronger zones are those that swept liquidity before reversing, as opposed to ordinary zones where price simply reversed.
  • Golden rule 3 - Liquidity and market structure shift: a confirmed structure shift and liquidity sweep signal that momentum is changing direction.
  • Liquidity is described as the fuel price needs to move toward a desired target, and traders should look for it being taken before entering.
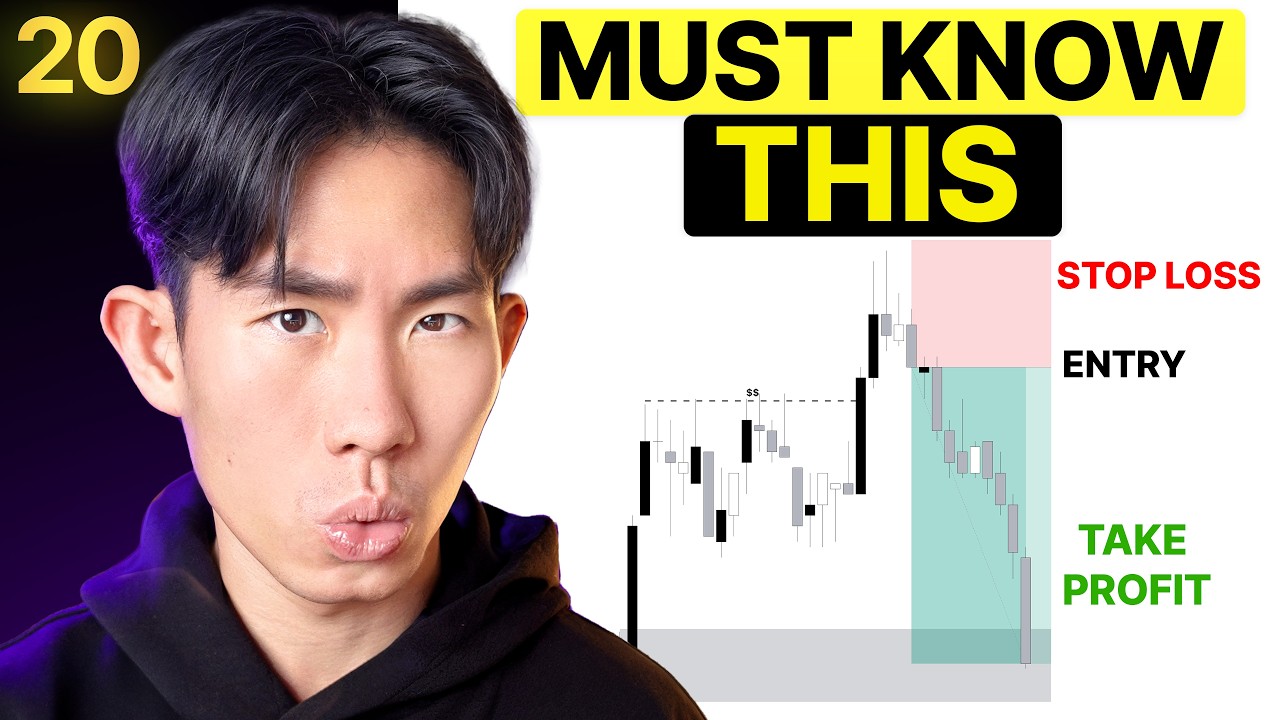
  • Golden rule 5 - Asymmetric risk-reward: no setup is worth taking unless the reward meaningfully exceeds the risk, with stop loss placed where the trade idea is invalidated and take profit at a logical target.
  • The lesson also introduces inversion thinking: identifying conditions that guarantee failure and avoiding them.
  • Bonus section covers definitions of key terms, with the speaker promising further tips at the end.

Answers

Questions about this video

What are the five golden rules for an A+ setup according to the video?

The five golden rules are bias alignment, a high-probability point of interest, market structure shift with liquidity considerations, liquidity as the fuel for price movement, and asymmetric risk-reward. A trade qualifies as A+ only if every one of these boxes is checked.

What should a trader do when the lower and higher timeframe trends disagree?

Brad advises staying out of the market or waiting for both timeframe trends to align. Trading against a conflicting higher timeframe trend is considered lower probability, especially for beginners.

Why does the speaker say the hardest part of trading is saying no?

He argues that most traders struggle not with spotting setups but with rejecting B setups that they would have considered A+ in the past. Discipline and boredom-tolerance are what allow traders to become consistently profitable.

Full Transcript — Download SRT & Markdown

00:00
Speaker A
The edge isn't in spotting A+ setups. It's in ignoring everything else. Most traders don't blow their trading accounts because they don't know how to enter a trade. We all know how to enter for a buy and enter for a sell.
00:14
Speaker A
But they blow their accounts because they cannot filter trades. They take B setups when they are bored.
00:21
Speaker A
They take C setups when they want action. They want adrenaline. They are trading for the sake of action rather than the sake of making money. And they call it experience, which is not true.
00:34
Speaker A
And remember, in trading, especially in trading, boring pays. Okay, so it's all about waiting for the A+ setup that checks off every single box and saying no to anything subpar in the meantime.
00:48
Speaker A
Right? It's always going to be the boring, repetitive tasks that actually allow you to get competent at trading, which actually allows you to make money from this market itself.
00:58
Speaker A
So, to me, I fundamentally believe that the hardest part about trading isn't spotting A+ setups, but rather saying no to the B setups that the past me would have called A+.
01:10
Speaker A
Anyways, in this lesson, I'm going to give you my exact A+ checklist right here. These are what I call the five golden rules. Okay, these are the five entry triggers that I check for before every single trade, right? Which means
01:23
Speaker A
that if I don't check off every single one of these boxes right here, that's a no trade. I will not enter the trade itself. If I miss just one, just like this, that is not an A+ setup. Okay,
01:35
Speaker A
that is just an A setup. Or it might not even be an A setup to some people's definition.
01:41
Speaker A
So, anyways, let me just go through and review each one of these entry criteria step by step. The first entry criteria, the first golden rule, is bias alignment.
01:53
Speaker A
Now, what do I mean by bias alignment? What I'm pretty much talking about is your immediate bias, which is your trade ideal, which is whether you're entering for a buy or entering for a sell.
02:04
Speaker A
Okay, so your trade ideal must align with the immediate bias. So, for example, in this case right here, price is clearly bearish, right?
02:14
Speaker A
So, if this is the case, I want to be trading in alignment with this internal structure, with this lower timeframe trend.
02:23
Speaker A
And if possible, I also want to be trading with the higher timeframe trend, because that dictates the institutional flow of money.
02:32
Speaker A
Okay, so if the lower timeframe trend is bearish, showing us that price is going down, and the higher timeframe trend is also bearish as well, which signifies to us that price is clearly going down, then my trade ideal needs to be bearish in
02:47
Speaker A
order for me to trade with the immediate bias, with the higher timeframe and the lower timeframe trend.
02:54
Speaker A
Okay, so ideally, I want to look for shorts. So, if I want to enter for a buy maybe somewhere around here, then this is me going against the lower timeframe trend and going against the higher timeframe
03:05
Speaker A
trend. And I'm not saying it's not going to work out, it could work out, but it's lower probability compared to you entering for sells, because that is actually in alignment with the overall structure of the market itself.
03:21
Speaker A
And a general rule of thumb is that if you find that the lower timeframe disagrees with the higher timeframe, it's probably not the right trade, right? Or rather, it's probably not going to work out in the way you
03:33
Speaker A
envision it to work out. So, for example, if right now the lower timeframe trend is bearish, cool, you want to enter for a sell. But the thing is, if you go up to the higher timeframe trend, you realize that we are actually
03:43
Speaker A
bullish. All right, so now you can see the lower timeframe trend is contradicting the higher timeframe trend. One is saying that you should sell, the other is saying that you should buy. One is saying that it's bearish, one is saying
03:54
Speaker A
that it's bullish. So, when there's such a contradiction, right? If you're a beginner, especially if you're a beginner, I would advise you to either stay out of the market or just wait for clarity. Wait for both of these
04:07
Speaker A
trends to actually align. Right? Wait for the lower timeframe trend to align with the higher timeframe trend.
04:12
Speaker A
So, that's the first thing. Okay? So, if price is bearish and you enter for a sell, and price is bullish, I want to enter for longs. As simple as that. Check.
04:21
Speaker A
This is where, if I look at the higher timeframe trend, we are actually heavily bullish. Okay? But, if I go down to the lower timeframe trend, this is actually bearish. So, depending on your trading style, if you're more of a
04:34
Speaker A
short-term trader, you will probably view this as a higher timeframe trend, right? So, this would be an easy sell position for you. But, if you're a swing trader, who is capitalizing on the higher timeframes, then ideally you
04:45
Speaker A
want to wait for price to get to a point of interest where you can look for longs to trade in continuation with the higher timeframe trend. So, that's the first thing.
04:55
Speaker A
Now, the second criterion for me to deem this setup as a high probability setup is that it needs to be situated at a high probability point of interest.
05:06
Speaker A
Now, you might be wondering, what is a high probability point of interest, Brent? So, if you have some form of trading experience, or if you have watched any of my videos, you would probably know how to identify your supply and demand
05:19
Speaker A
zones. Okay? Supply and demand zones, I'm not going to go through them in depth in this particular lesson itself, right? So, if you need help with that, please go through my lessons on YouTube. But, anyways, if you
05:32
Speaker A
have gone through those lessons, you will understand how to draw your supply and demand zones, how to identify them, how to mark them up on the charts. So, if that's the case, you'll probably see that this is a supply zone, and then
05:43
Speaker A
this is also a supply zone, and then this is also a supply zone. Right? And you can see in this case there are so many different supply zones. And then similarly there are so many different demand zones that we can mark
05:52
Speaker A
up right here. The fundamental principle you must understand is that not all supply and demand zones are created equal.
06:00
Speaker A
Which means that there are certain zones which are much stronger than the other zones. Which means that price is most likely going to respect those zones. And price is most likely going to disregard those zones which are not
06:12
Speaker A
strong. Right, so for example in this case, if this supply zone is deemed high probability, price is most likely going to get a reaction from it. Right, so the minute price mitigates that supply zone, price is actually going to start
06:26
Speaker A
shifting bearish. Okay, it's going to respect that supply zone. But then if it's a low probability point of interest, which means that price is not going to respect it, price is just going to blast right through it just like this
06:38
Speaker A
and just continue going up. Okay, so that's what I mean when I say high probability point of interest. It's simply a supply and demand zone or order block or flip zone, whatever other names you like to call it, that price is most
06:51
Speaker A
likely going to respect. The next question becomes, how do we identify these high probability zones?
06:58
Speaker A
Now, there are a few criteria, right? The first criterion is that it needs to be aligned with the trend itself. So if I'm looking at this right here, okay?
07:08
Speaker A
Is this, let's say, an extreme supply zone? And then let's say there is another demand zone, like let's say right here, okay? So we will just color this green to signal a demand
07:18
Speaker A
zone. Okay, so in this particular case, for a high probability zone, the first criterion is that it needs to be aligned with the trend. Right, similar to what we mentioned just now about the alignment of the bias, the point of
07:32
Speaker A
interest needs to be aligned with the immediate trend direction for us to deem it as high probability.
07:39
Speaker A
So if the immediate trend right here is bearish, right? We can clearly see price is going down, creating lower highs and lower lows, just like this. Then, we will know that a supply zone, right?
07:51
Speaker A
Is aligned with the lower time frame trend, which means that price is most likely going to respect the previous supply zone, just like this, and continue going down even further.
08:02
Speaker A
However, if there's a demand zone in a downtrend, just like this, price is most likely going to blast right through it, because the internal trend right now is heavily bearish. Okay, so in this case, a high probability zone would be supply
08:16
Speaker A
zone. A low probability zone would be demand zone, right? Because the demand zone is not aligned with the immediate trend direction itself.
08:23
Speaker A
Okay? Now, another criteria that I want to look out for, this will be a little bit advanced, so once again, I would highly recommend you to check out my videos on my YouTube channel, The Trading Geek, where I talk more about this. But, the
08:36
Speaker A
next criteria is that it needs to have liquidity, or it needs to have available liquidity near it. Okay, so in this case, if I compare this point of interest to this point of interest right here, you can see that in this point of interest,
08:50
Speaker A
price actually go up, pulls back, goes up, swept liquidity, and then comes down even further, right? So, this right here is what we call a liquidity sweep, and this is a supply zone with liquidity sweep. Compared to this one right here,
09:02
Speaker A
where price just went up there, did not sweep any liquidity, and it just reversed. So, this is the ordinary supply zone. So, this supply zone that swept liquidity is going to be much more high probability, much more stronger
09:13
Speaker A
than this supply zone, in theory. Okay? And, if there is available liquidity near it, that'll be even better. What I mean by available liquidity is that when price goes down, just like this, after the supply zone was formed, it did not go down straight.
09:27
Speaker A
Instead of going down straight, it actually made like a minor pullback, just like this, creating a lower high, which means that there is going to be available liquidity, stop orders, stop losses, sitting above these highs right here, right? So, the next time price
09:39
Speaker A
comes up to this supply zone, it's most likely going to sweep the liquidity above these highs, use this available liquidity to cause price to go down even further.
09:48
Speaker A
All right. So, it'll be good if we have available liquidity near the the point of interest itself. So, anyways, that's what constitute as a high probability uh point of interest, uh institutional zone. It's one in which is aligned with
10:01
Speaker A
the trend direction, and it's also one in which we have some form of liquidity sweep or some form of available liquidity sitting near it.
10:11
Speaker A
All right. So, the next criteria right here is that price needs to be sitting at the hype of the point of interest, not near it just like this, okay? Not almost reaching it just like this. It needs to
10:24
Speaker A
actually be in it. Okay. So, if I'm trading and I saw my my setup, you know, I want to enter for a buy or enter for a sell, I need to ask myself, is price in a high probability point of interest? Because
10:39
Speaker A
if it isn't, then my friend, you are trading in the middle of nowhere, and if you're trading in the middle of nowhere, it's incredibly low probability because price can go both ways. It can either go up or it can either go down. So,
10:49
Speaker A
ideally, I want to see price situated within the high probability point of interest. So, in this case, I want to see price enter into this supply zone, and it needs to be in here, okay? If it's over here, I cannot check off this
11:01
Speaker A
box. If it's over here, I cannot check off this box. But once it goes inside this box, then I can check off this box.
11:07
Speaker A
Right. Now, we see that price is within a high probability point of interest. And to me, that is the location in which you want to be trading. All right.
11:18
Speaker A
Success equal location plus timing. Okay. It requires you to take the right trade ideal at the right place at the right time.
11:28
Speaker A
Okay, those are the three criteria. I'm We're talk about the right time later on.
11:32
Speaker A
Now, the next step, or rather the next golden rule, is liquidity shift and market structure shift. All right. So, this is what I call market shift. It's something that signaled to us that the structure is shifting. Let me explain,
11:46
Speaker A
right? So, obviously I've already covered liquidity shift, so I'm not going to cover that again. But, let's say in this particular case, this is the higher point of the point of interest in which we want to be trading from. And
11:55
Speaker A
right now price has pretty much created a created like a new higher low just like this, okay? And then it's approaching this supply zone over here.
12:02
Speaker A
So, the minute it enter into this supply zone, there's a few things that I want to look out for.
12:06
Speaker A
The first thing is I want to look out for some form of liquidity shift, right?
12:10
Speaker A
So, ideally, you know, I want to see price shift the available liquidity above this highest right here, or create some form of swing high just like this, and then shift that high, and then comes down just like this, okay?
12:22
Speaker A
That's the first thing. I always look for liquidity shift before I enter. No liquidity shift, no entry, as simple as that.
12:28
Speaker A
The next thing is that I want to see a market shift. A market shift confirmed to me that the structure is shifting bearish. Because at this point of time price is going up just like this, and price can just continue going up, right?
12:39
Speaker A
That is why we need confirmation to tell us that price is going to shift bearish.
12:43
Speaker A
If not, we cannot enter for a sell, and that requires you to look out for a market shift. So, in this case, price goes up, comes down creating like this last lower high, last higher low before it goes up even further. So, I want to
12:55
Speaker A
see price comes down, take out the last higher low, breaking structure, giving me a market shift, confirming to me that now the structure has shifted in my desired direction. Right, price has officially shifted up from bullish, right, to bearish.
13:11
Speaker A
And right now price is reversing. Okay, so the minute I got a liquidity shift, and also got a market shift just like this, then that is where we can check off this next criteria itself.
13:23
Speaker A
Which brings us to the next golden rule, which is timing. I only want to enter for a trade when it's within my Q zone window. Okay, this is something that you can do if you're trading on Edge Flow, which you should
13:36
Speaker A
be if you're watching this. You can actually customize your trading window. Right, you can specify what time you want to be trading.
13:45
Speaker A
And ideally you want to be trading within what we call Q zones, right, as Forex traders. If you're not a Forex trader, you probably do not know what I'm talking about, but if you're a Forex trader and you have some form of
13:55
Speaker A
experience, you would know exactly what I'm talking about. Q zones are essentially the best time to trade throughout the day. Okay, because the Forex market is open 24 hours a day, but that doesn't mean you should be trading
14:06
Speaker A
24 hours every single day. There are certain pockets of time within the day itself that present you the most amount of trading opportunities, and that's what we call Q zones, right? Once again, not going to go too in-depth into Q
14:18
Speaker A
zones. You can do more research about this or you can check out my other videos on this, but basically these are the best time to trade.
14:25
Speaker A
So, for me I like to trade during the London Q zone, which is around 3:00 p.m.
14:29
Speaker A
Singapore time to around like 5:00 to 6:00 p.m. Singapore time. So, that means that I want to see my setup appear during that window itself.
14:40
Speaker A
If the setup appear before that window or after with that window and it's not within any Q zone, then I personally will not enter for the setup itself. It provides the ignition that I need in order for price to move in my
14:52
Speaker A
desired direction. What I basically mean by that is that liquidity is the fuel, okay? Liquidity is the fuel, the rocket fuel that price needs to move in the particular direction that I want it to move in.
15:04
Speaker A
But, fuel requires ignition. Fuel requires fire to light it up, and timing is that fire. And to me, the timing is usually during some form of Q zone, right? So, at 3:00 p.m. that is where institutions start trading the
15:19
Speaker A
London session. Huge amount of buy or sell orders start entering to the market and that caused price to move very very fast in my desired direction. Right? So, yeah, that is why ideally I want the setup to appear during Q zone. So, in
15:33
Speaker A
this case, I want to see this exact entry model during, let's say, like 3:00 p.m. to around like 6:00 p.m. Singapore time, which is the London Q zone.
15:43
Speaker A
And if you trade anywhere outside the Q zone, I'm not saying that it cannot play out. It could play out, right? The same trade idea could play out perfectly if it's at the right place at the is the
15:53
Speaker A
right trade idea, but I'm saying that there's a lower chance of it playing out and there's a higher chance for price to take longer for it to go down to your take profit level. And there's also more randomness. There is more
16:08
Speaker A
unpredictability, right? There there's more uncertainty in the market. So, that this is your when filter, right? This is the filter that allows you to know exactly when to enter for the trade itself.
16:19
Speaker A
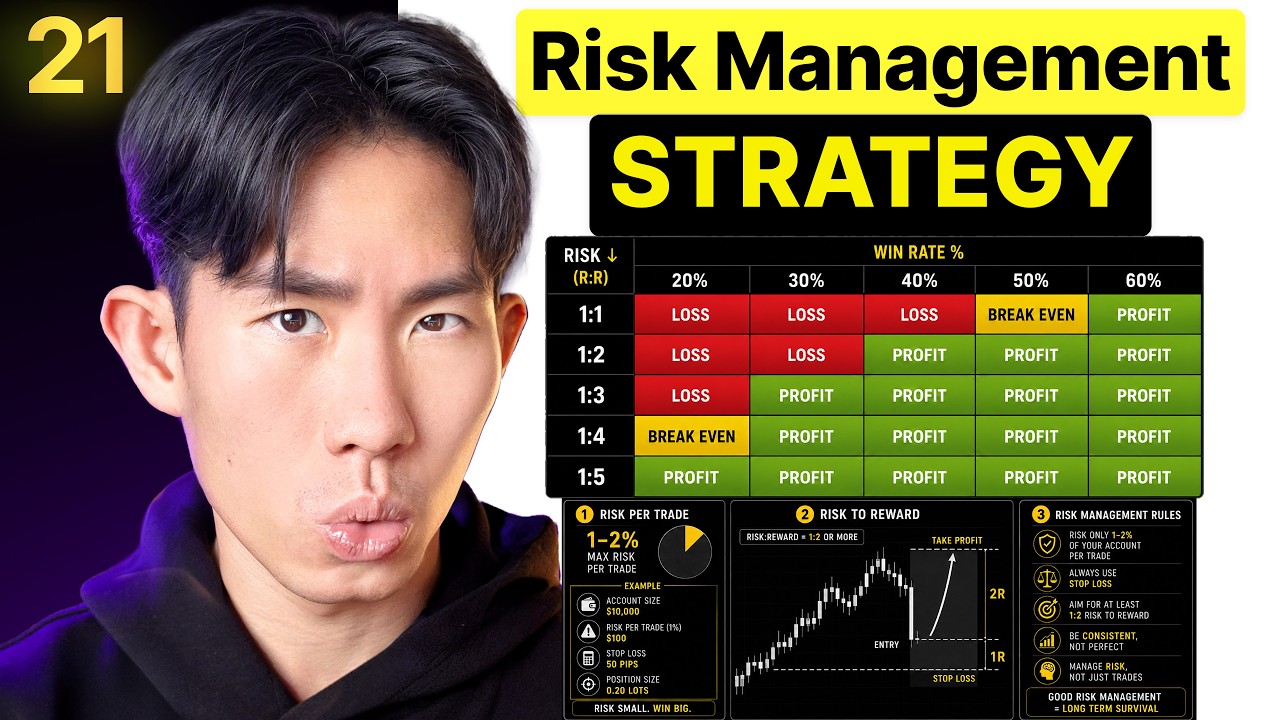
Now, last but not least is a asymmetric risk reward. I do not care how good the setup is. I do not care how many entry confluences the setup has if it does not have an asymmetric risk reward ratio.
16:34
Speaker A
Okay, what do we basically mean by that is that I want to make sure that if I'm entering for a trade, it needs to have a much more smaller downside compared to the upside. I need to get back twice as
16:46
Speaker A
much as I'm risking. All right? So, in this case itself, if I'm entering for a short right here at this point of interest, I'm placing my stop loss above this high or above this supply zone and I'm placing my take profit at this area
16:57
Speaker A
right here. Like let's just put like a random area right here. In this case, this is a 1:5 risk reward ratio trade, which means that I'm risking $10 to get back $5.56 in return. And to me, that's pretty
17:09
Speaker A
worth it, right? Because you're literally getting back five times in return of what you're risking. But, if you actually base it like something like this, right? You place a stop loss above the high, place a take profit below like
17:22
Speaker A
this low right here or something. In this case, you can see a risk to reward ratio just swing to one, right? Which means that you are literally risking $10 to get back $10, which means not worth it, right? Ideally, I wanted to have I
17:35
Speaker A
want to get back at least twice compared to what I'm risking in the first place.
17:39
Speaker A
Okay? So, in order for you to go calculate your risk to reward ratio, you want to make sure that you place a stop loss at a price point which invalidate the trade idea, right? Where you are wrong, and you want to base a take
17:49
Speaker A
profit at where you are targeting. If you are completely new, I would highly suggest you to just stick to like a fixed risk to reward ratio trade set up every single time. So, every single time, you just After you place a stop
18:00
Speaker A
loss, you just try to target 2R just like this. All right? So, my personal rule is that if the trade idea presents a risk to reward ratio of less than two, right? One or 0.5 just like this, no matter how many confidences I
18:16
Speaker A
have, no matter how confident I am, I'm going to be passing on the trade itself.
18:19
Speaker A
Okay, so that's when you should be trading, okay? It's important to know when to trade, but it's even more important to know when not to trade.
18:27
Speaker A
Charlie Munger famously said, "The only thing I want to know is where I'm going to die, so I never go there." He was basically talking about the concept of inversion.
18:39
Speaker A
So, instead of asking, "How do I succeed at trading?" you should be asking, "What guarantees I fail?" Instead of asking, "What are the entry criteria that I should look out for so that I win?" you should be asking, "What are the
18:54
Speaker A
conditions that I should be staying away from so that I do not fail?" Right? So, that's pretty much the concept of inversion. You want to lay down the stuff that is not going to work, and then just don't do those stuff, right?
19:06
Speaker A
It's the same exact idea in trading. You don't need to find some magical trick to win more trade. You just need to stop doing the dumb stuff that guarantee losses. Things like trading outside your time window, trading without a trade plan. Right? If
19:23
Speaker A
you do have a trade plan, ignoring your plan and taking random setups because you want action, because you want adrenaline, because you want to make money rather than executing your process.
19:34
Speaker A
All right. So, to me, when not to trade is when your bias is not aligned. Okay?
19:39
Speaker A
When your bias is not aligned, highly recommend you not to trade. And another place that you should probably not trade is when price is not at a point of interest yet. Right? So, if price is in the middle of nowhere,
19:53
Speaker A
okay, you probably shouldn't be trading. And then if there's no sweep or no market shift, this just tell us that, you know, there is no confirmation, there is no entry trigger, then once again, you want to wait for further
20:06
Speaker A
confirmation before your entry. And when it's outside your Q zone, outside the best time that you should be trading within. And also, most importantly, your risk to reward is not asymmetric or you cannot determine where to place a stop loss or where to place a
20:19
Speaker A
take profit. Like if you don't know exactly where to get out, then you probably shouldn't enter for the trade itself.
20:25
Speaker A
So, those are like my no trade conditions. Right? If any one of these is present in the market, I'm not going to be trading. No matter how confluent how confident I am, no matter how much I want to make money in the market, okay?
20:38
Speaker A
All right. So, that's basically how you actually identify A+ setups. Basically, you don't want to be hunting trades, you don't want to be chasing trade, you want to wait for price to come to you. Right?
20:49
Speaker A
Because remember, whatever you chase runs away. And that applies not just in trading, but also in money as well. You don't chase money, you attract money.
20:57
Speaker A
And I pretty much just gave you the checklist that you should be looking out for in order for you to attract the right setups. And it's in this particular order itself. Your bias, your point of interest, your sweep plus
21:08
Speaker A
market shift, your timing, and your risk to reward. As long as you follow this order, you'll be fine, right? If any box fails, right? If you fail to find any one of these entry criteria, entry triggers, you do nothing. You stay out
21:20
Speaker A
the market. That's it. Remember, the most profitable position in the market is waiting. That's it.
21:26
Speaker A
So, before we end here today, I thought it'd be pretty good if I give you some bonus tips, right? So, the first thing I want to go through is the definitions, right? Let me just put this in, right here. These are the
21:39
Speaker A
definitions of the different sort of setups that will probably be available to you in the market itself.
21:45
Speaker A
And A+ setup is basically a setup where all five of these triggers are checked.
21:50
Speaker A
And the mere A setup, not A+, A setup, is the trade idea which meets the entry criteria within my active trade plan, but it may not hit all five A+ triggers.
22:02
Speaker A
Okay, so sometimes I look at my trade plan and I see everything is checked off. If everything is checked off, cool, right? I don't need to have the five A+ triggers to actually enter for the trade, because if
22:11
Speaker A
I'm always looking for A+ setups only, I'm going to be under trading very often, right? So, I actually allow A+ setup as well, right? And then for B's and C setups, no trade whatsoever, right? If a setup is low probability,
22:26
Speaker A
I don't want to be wasting my money on it. As simple as that. And this is, once again, like a bonus tip. You don't have to follow this, right? This is some This is what some professional traders do, and that is to
22:38
Speaker A
size your trades according to the criteria, not according to vibes, not according to feelings, not according to your confidence, your fake little confidence.
22:48
Speaker A
So, you could take 0.5% risk on A setup, and you could also take 1% risk on A+ setup, which means that you size up a little bit more based on the fact that there is more confluences in the market and since there's more
23:04
Speaker A
confluences in the market there's a higher chance that price is going to play out. And you want to make sure that you are milking as much money as possible from this win itself. Once again, this is not for everybody. If you
23:14
Speaker A
don't have sufficient data, if you don't know what you're doing, I would suggest you to stick to like a consistent fixed risk per trade. Whether it's A setup or A+ setup, you just stick to 0.5% or 1%.
23:25
Speaker A
That's it. But if you want to be a little bit more advanced, a little bit more professional, right? This is something that you can consider doing. I would always advise you to just make the correct judgment based on data. Right,
23:38
Speaker A
you can test this out and if it works for you, you can stick to it. If it doesn't, you can just go back to sticking to a consistent risk per trade.
23:45
Speaker A
And here are also some non-negotiables, right? Like no matter how lucky you are, no matter how much of a winning streak you are in right now, no matter how much losses you incurred, please always make sure you follow these
23:57
Speaker A
rules itself. And that is never size up to make back losses, never size up because you feel good, right? Like I said, you follow the entry criteria, you follow your risk management. Anything else is just noise.
24:09
Speaker A
And you only size up when your checklist quantifies it, right? So if it's an A+ setup, then you can consider ramping up your lots a little bit.
24:17
Speaker A
And at the end of day, no matter how confident you are, always protect your downside by placing a stop loss, by respecting your guardrails, right? By, you know, sticking to the max daily loss, the max daily profit, the max
24:30
Speaker A
streak rule, whatever guardrails that you have set inside Edge Flow. Okay? So that's pretty much it. Just understand that when you start to understand all of this stuff that I just shared and you just internalize it and you start implementing it and you build
24:43
Speaker A
it into your trading routine, now you are improving your standards. Now you're operating at a higher standard. And when you're operating at a higher standard, guess what? Your results is going to be at a higher standard as well. Your
24:56
Speaker A
results will automatically improve when you start doing all of these actions, all of these um stuff that I just talked about right here. Okay? So, in the next lesson, we're going to go through how to execute your trades properly, and how to
25:07
Speaker A
use the trade gods, and to like just boost your execution, right? To allow you to execute much more faster and much more precise.
Topics:A+ setupsupply and demandmarket structure shiftliquidityrisk rewardbias alignmentorder blocktrading disciplineprice actionBrad Goh

Get More with the SozAI App

Transcribe recordings, audio files, and YouTube videos — with AI summaries and speaker detection. 30 minutes free.

Or transcribe another YouTube video here →