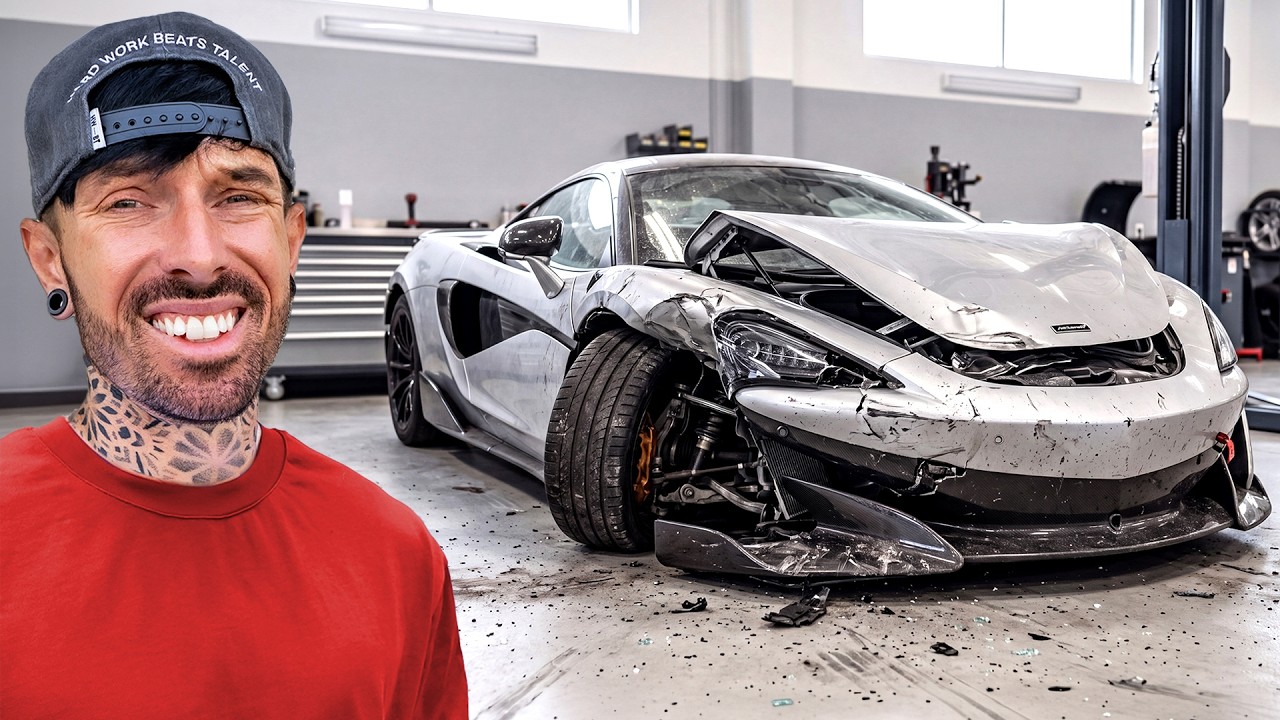
FITTING A $700,000 BODYKIT TO THE WRECKED BUGATTI CHIRON — Transcript

Rebuilding a $6M Bugatti Chiron with a $700K custom bodykit, fixing faults, and fitting unique parts with expert precision.

Key Takeaways

  • Bugatti does not supply parts for this crashed Chiron, requiring custom fabrication.
  • Custom bodykit from Venom is a rare, high-cost solution tailored for this unique car.
  • Fixing electronic faults is critical before cosmetic restoration can proceed.
  • Small components, like a fuse locking tab, can cause persistent fault lights.
  • Fitting custom body panels requires significant modification and expert precision.

Summary

  • The video documents the rebuilding process of a $6 million Bugatti Chiron, focusing on the challenge of sourcing and fitting body panels.
  • Bugatti refused to sell original parts, so the team improvised and created custom body panels and headlights.
  • A $700,000 custom bodykit from Venom in Dubai is introduced, designed to be aerodynamic and unique for this one-of-a-kind car.
  • The team addresses dashboard faults including airbag, engine, and EPC lights before proceeding with cosmetic work.
  • A detailed fix for the persistent airbag light involves replacing a fuse component with a part from a Mercedes Vito van.
  • The video shows the complex process of fitting the custom body panels, including cutting and modifying the chassis and quarter panels.
  • Challenges include aligning new parts with the chassis and overcoming obstructions from internal modules.
  • The team successfully fits working headlights and side lights, though some issues with DRLs remain.
  • The rebuild is performed in a Miami workshop, marking the first car rebuild at this location.
  • The video highlights the rarity and difficulty of such a project, emphasizing the expertise and equipment required.

Full Transcript — Download SRT & Markdown

00:00
Speaker A
I'm so close to rebuilding this $6 million Bugatti Chiron purport. But there's one thing now that's really slowing us down. I can't believe that's how it came, and that is the body panels.
00:14
Speaker A
Since Bugatti decided early on there wasn't going to sell us any parts for this car. We just don't think it's safe.
00:20
Speaker A
We've had to improvise and make everything ourselves. Wow. It's looking good. Insane. There it is.
00:28
Speaker A
That's including tearing the car in half and fixing gearbox mounts, putting them back together, and even driving it again for the first time.
00:37
Speaker A
She's driving so well. I'm so proud. And none of which Bugatti thought was possible.
00:43
Speaker A
You can't do that in a garage. There's just a few places in the world with the right equipment and only a few people in the world to be able to do that.
00:52
Speaker A
But in order to finish this car, we're going to need body panels and headlights.
00:59
Speaker A
And making these is going to be pretty difficult. Oh my God. So, it looks like our wait is over.
01:22
Speaker A
What's in this box is about to change this Bugatti Chiron for good. What just happened?
01:30
Speaker A
I have, I'm just in shock. What's in that box? I can't believe it's coming all the way from Dubai on a helicopter.
01:43
Speaker A
The parts have arrived to continue the build. I don't know what kind of shipping service Alex bought, but it got here a lot quicker than what the fuel control module has got from France to the UK. Alex, what is in that
02:00
Speaker A
box? I'm going to be fair. I have no bloody idea. It's in the box. I have no idea. But shortly, we will find out. I promise you that.
02:10
Speaker A
Now neither me nor Alex know exactly what's inside that box because we put our trust in Venom.
02:22
Speaker A
You guys said you needed it fast. This was as fast as we could get here.
02:26
Speaker A
And as some of you may know, they make insane body kits for cars all the way over in Dubai. And we reached out to them in hopes that they could build us the standard body panels to rebuild this Chiron. But with this
02:42
Speaker A
car being crash damaged and a one of one car, it was a perfect opportunity to make it even more special.
02:50
Speaker A
You want aerodynamic, you want time, you want this very fast. So they went ahead and designed something that's never been done before.
02:59
Speaker A
And now it's my job to try and make it fit to the car. I reckon he needs a bigger truck, man.
03:08
Speaker A
Yeah, I think he does. All right, mate. Go. How's it going, bro? Good. Good to see you.
03:18
Speaker A
Let's do it. Time to get to work. The Bugatti is here in the back garden of the house in Miami. Never did I think I'd ever say that, but it looks vibey as anything. We're so, so close. Now, the
03:36
Speaker A
body kit is over in that box over there. We still have no idea what it's going to look like. It's like a $700,000 body kit. No one's ever done it before, and this is going to be the perfect
03:47
Speaker A
opportunity to do it on this type of car, being that we can't buy original body panels. But there is a lot more to do on this Bugatti to start with before we get to fitting the body kit. In the
03:58
Speaker A
last video, we really struggled to get that airbag light off the dashboard. And I've noticed there is an engine light on the dashboard as well now. So, we want to check over, get this car completely faultless, and then we can start fitting
04:09
Speaker A
all the body panels on the car. Let's get it inside the workshop, and it's going to be the first ever car we rebuild at the Miami house. Let's get it in. So, even though we got the Bugatti shoe on running in the last video, there
04:24
Speaker A
is still some faults we need to get through. And those faults are leaving lights on the dashboard. All of which I'd like to get off before we continue doing the cosmetic stuff on the car. So, we got a fair few faults on the dash.
04:39
Speaker A
Airbag, engine, and EPC. We'll scan those fault codes and we'll see what we've got. Hopefully solve them before we start doing any cosmetic mods.
04:51
Speaker A
Now, these are the lights that we're trying to get off the dashboard. The engine light, the EPC light, and the airbag light. The engine light and the EPC are on due to random misfires. But they're a passive fault, and it's
05:05
Speaker A
probably because the battery's got pretty low. So, just clearing the codes should sort those two lights out. But the airbag light is a different story.
05:13
Speaker A
The Kryptonite, the one we struggled on the second channel to try and get off.
05:17
Speaker A
We put all the airbags in, all the Audi A3, the Aston Martin airbags, all that are fitted in. And we nearly got all the fault codes off apart from one, which is this one.
05:28
Speaker A
Battery interruption igniter resistance too low, which we found out is this fuse on the battery, which is supposed to cut power to the car when the car's in an accident. Now, we replaced that fuse, but we still got the fault code. We've
05:44
Speaker A
since done some research, and we found exactly why that is still coming on, and you won't believe the fix for it. Well, I hope it is the fix for it. But to get to it, the battery is underneath this
05:54
Speaker A
car. So, we got to get it in the RAM. And hopefully, we can fix this. Right.
05:58
Speaker A
Let's get this airbag light off the dash for now. Let's clear the codes for the engine. And hopefully, we're going to have a clear dashboard before moving on to finally getting this car full body kitted out. It's going to look sick.
06:11
Speaker A
Let's go. So, for the first time ever in the new unit, up goes the Bugatti Chiron. And just a quick inspection after Alex has been driving it since I've been away. Everything underneath the car still looks pretty good and dry
06:25
Speaker A
with no damages. Here is the battery. And this is what's causing us the issue.
06:33
Speaker A
This fuse right here. But actually, it's not quite the fuse that's the issue. This is a new fuse here which is like 15 quid and it's off a Mercedes Vito van.
06:44
Speaker A
And all you do, we've got to be really careful here because we need this orange tab and we need it not to break when it comes out. This orange tab here is a sort of locking tab which pushes down on
06:57
Speaker A
top of the plug which clips onto the fuse. And right now I'm removing mine from the fuse which is on the car. And you can see on the fuse that I've just bought, the locking tab has two little
07:07
Speaker A
prongs which sort of stop the connectors shorting out when you push down the orange tab. But we need to get this out without breaking it and slot it into that one.
07:19
Speaker A
Yes, it's intact. And that's because you can see on R1, those two little prongs have broken off. And apparently without those two prongs, those two little electrical pins inside the fuse are able to touch each other. We've got to get that on
07:34
Speaker A
there without breaking this. And I remember it was really hard before. So now with our good bit of orange plastic, I'm going to transfer it out of the one I've bought and into the electrical connector which is on the car. Boom. And
07:46
Speaker A
lock it all down. So there is a high chance we didn't actually need to replace that fuse. But I guess now we're going to find out whether just that little piece of plastic has solved our airbag light.
08:00
Speaker A
Passive. 3, 2, 1. Could have worked. Ready engine. It's worked, my guy. Check that out. No faults.
08:35
Speaker A
Doesn't sound like it's misfiring at all, does it? Sounds good. Finally, we've got a faultless Bugatti Chiron for the first time since the accident.
08:50
Speaker A
This is a good unit. It's just very hot. It's very hot in here. Maybe if we do manage to fix this, if Alex pays us, we can buy some better air con. Good fix.
09:03
Speaker A
Just that tiny bit of plastic. And me and Toby went all around Miami trying to find power fuses last time and it was just that little bit of plastic. The more you know if you got a Mercedes Vito
09:13
Speaker A
van and you remove your battery, be careful with that orange bit of plastic. Now it's time for the bit I've been waiting for for months.
09:24
Speaker A
Let's start fitting these body panels. In order for us to start fitting these body panels, I've got to start fitting the existing ones that didn't have any damage to them. Here is the quarter panel. This was the last part to come
09:41
Speaker A
off the car. We needed to take this off to split the car in half and it went sort of it sits like that. The wrap has been removed and it has been wet sanded because we're almost ready for paint on
09:55
Speaker A
the car. We're not using the wr
10:09
Speaker A
fitting the body kit. So, it's kind of wet sanded, ready for paint, but we need to make sure the body kit actually fits.
10:16
Speaker A
Let's build this up. There's a carbon side skirt to go on the bottom of it.
10:19
Speaker A
Let's put that on and let's start fitting the Venom kit to this. and then we're going to get our first taste of what this kit is actually going to be like. Here we go.
10:28
Speaker A
So, the first thing to go on is this carbon fiber side skirt, which is of course standard on the Bugatti Shiron Purport. This just bolts to the bottom of the rear quarter. Liam's doing one side whilst I've done the other side.
10:42
Speaker A
Then once that's on, we can start lifting the rear quarter panel with the side skirt onto the car. And we're only going to hang it on with a few bolts for now because the next thing we're going to need is part of the body kit.
10:54
Speaker A
Okay. Watch yourself on the steps on the way down. Okay. All right. This box has been at Alex's house for a long time before we got here. He's been dying to open it. We've not even seen it. We have no idea what like we we
11:09
Speaker A
obviously have seen renders of what the kit's going to look like, but this could be terrible. This could be terrible and we could have got scammed. It could be like the tee where it like comes half strong.
11:20
Speaker A
I'm I'm genuinely I don't know what to expect yet because we seen the renders.
11:25
Speaker A
I was like there's no way all of that is in here. I don't think it fits in here. But we're about to find way.
11:30
Speaker A
Right. Let's get the drill. Here we go with the Venom widebody Bugatti Chiron kit. Each part we're unbolting is a lot more aggressive than the standard parts. Next up, the front end.
11:51
Speaker A
And it looks insane. Does it look cool? That looks mental. But before we continue unboxing the rest of the kit, the only part we need for now are these sections here. Okay, here we go. And this section is a rear arch
12:07
Speaker A
extension. And right now, I'm a little skeptical there. So that it looks like we're going to have to do some cutting. Cut out.
12:18
Speaker A
Once we cut it, it's done within it. Like once we cut it, it's done with.
12:23
Speaker A
Like But if we cut it wrong, what happens? Alex has got to buy a new quarter.
12:31
Speaker A
There it's got to be cut out in a massive box. Yeah. Give that 10 because that ain't going to sit flat. It's going to have to go like this. It looks like in order to fit this kit, we're going to have to
12:42
Speaker A
start cutting out this rear quarter. It's a pretty scary job. That's the first thing that's got to go on the car cuz we can't fit without that. We can't fit the side skirt. Without that, we can't fit the wing. Without that, we
12:55
Speaker A
can't fit the front. Like, everything has got to go in off that. And the front's going to be a nightmare in itself because the whole thing is modified. And at the minute, I'm really hesitant to cut in to a perfectly good
13:09
Speaker A
rig water. It's got to be done. Okay, had a sleep on it. And uh yeah, we've got to cut a perfectly good shoe on quarter. I I apologize. This has got to be cut because we're putting in an extra vent in here. Uh there is
13:29
Speaker A
coolers in here. So, it is actually an active vent. I've just got to get this right because we can't get it right.
13:33
Speaker A
There's no replacing anything. Everything's got to be cut. We got to cut there. We've got to bolt it to it.
13:43
Speaker A
Let's use this side as a tester, but not mess it up. And then we'll know exactly what we're going to do on the left hand side.
13:52
Speaker A
Here we go. We've done a lot of questionable things in the past, but I think cutting a Batti Chiron open has now definitely got to be up there. Oh my days. In order for this kit to work, we've got to cut a hole in
14:12
Speaker A
this rear quarter. That way, this arch extension, which extends the arch by around 30 mm, can sit flush on the rear quarter. And after cutting quite a fair bit out, eventually we got somewhere.
14:27
Speaker A
Look at that hole. Okay. Right at the back of this there are threads for screws all the way through. So I assume that this does actually get screwed onto the side of the quarter panel. We've just got to
14:42
Speaker A
drill the holes through the quarter panel. But what's blocking it at the minute are these bolts here cuz you're holding this wing end plate on. And so when we line this up there, now you can see there's a gap
15:01
Speaker A
here all the way along the top. And that's cuz those bolts which are holding that wing plate on are blocking are blocking us right now. So, the issue is once we drill these holes, we've got to make sure it is bang on.
15:17
Speaker A
I'm going to take that off. There should be some holes straight through. Mark the holes up. We should be able to put some bolts through the other side and then we can start fitting this like not final fitment obviously because I I
15:28
Speaker A
think it would be really nice to smooth this into the panel. Okay, so out come the bolts which hold this wing end plate on. That way I can see directly through where the holes need to go. I can then
15:39
Speaker A
mark them up with a pen. And once I'm happy with it, I can start drilling the holes out. And once I actually started drilling those holes out, I realized the original quarter has a double skin around this area. So, it's not going to
15:51
Speaker A
be possible to bolt the end plate on through the original quarter. Right. All those holes because there's an ECU that needs to be bolted to the other side.
16:01
Speaker A
All we're doing is making clearance for the bolts on the back half of the arch.
16:07
Speaker A
So, these don't need to be holes. So, we're just going to cut out a little section so it sits nice and flush. Here we go.
16:16
Speaker A
So, all this section is there for is to make clearance for the bolts which hold the wing plate on to the arch extension.
16:23
Speaker A
I'm not going to be able to bolt it through the quarter because, as I mentioned, there's some kind of module which bolts to the quarter on the inside, and that is obstructing where the bolts would go through to hold the
16:34
Speaker A
wing plate on, if that makes sense. So essentially, I've just made clearance now and now the arch extension can sit flush to the old rear quarter, which is looking good. Fit the arch completely onto the car properly. We've got to get
16:47
Speaker A
it off now. And then we can bolt it from the back, drill the holes in it to put the bolts in from the back of it. And whilst that's off, we should be able to fit the side skirt as well. And then
16:56
Speaker A
lift it on and see what it looks like roughly on. And that should be one side kind of complete to an extent. It's not too bad once you know what you're doing, but there is going to need to be some body
17:10
Speaker A
work to just perfect it in. So everything take with a pinch of salt with an open mind because at the minute we're still trying to do the same thing.
17:18
Speaker A
We're like, is this going to look good or not? And we're sort of committed because there's holes in it. To know exactly where I need to drill the holes to hold the arch extension in, I'm putting some masking tape there. And
17:31
Speaker A
then in these threaded holes in the arch extension, I'm just twisting in some threads, which I cut off the end of a few bolts cuz I had to shorten them. And the sharpness on the end of these threads when I push the arch extension
17:43
Speaker A
up to the masking tape should create some markings where I know I need to drill out the holes for the bolts to go in. As you can see just here.
17:54
Speaker A
Now, all of this does seem pretty crazy, but remember, this was a perfect opportunity to create a Bugatti just like this, as we can't get the standard panels, so I'm excited to see what it's going to look like at the end. I've got
18:06
Speaker A
a feeling it's going to be kind of a cross between the Bugatti Bel and this sort of concept race Chiron car. For now, we've got the rear quarter off, so I can put the bolts from the inside of
18:16
Speaker A
the quarter to hold on that arch extension side skirt. How does this go on?
18:28
Speaker A
Bolt hole there and a bolt hole there. What's the plan? Right, we're going to take the side skirt off and bolt that new side skirt to the old side skirt and then bolt it all together. Off we go. So, it looks
18:45
Speaker A
like we've got to take off the carbon side skirt, which is standard to the Purport. Once we've got that lifted away from the rear quarter, we can start bolting the additional extended side skirt to the carbon fiber one, which
19:00
Speaker A
means we got to drill a few holes. And because there's already riv nuts in place of the carbon side skirt, we can just put some bolts through and tighten it up to it. Now, we've got to fit the
19:10
Speaker A
outside of the side skirt extension to the carbon fiber, which means drilling out the carbon fiber. And by now, I've just kind of got used to it.
19:21
Speaker A
I'm marking out the holes, drilling straight through the Bugatti carbon. And once these holes are drilled out, I can then thread some bolts through to hold on the side of the side skirt extension to the carbon fiber. It looks like I may
19:34
Speaker A
need to add spacers on the bottom for it all to sit nice and flush, but remember this is just the first fit. And of course, once I've done one side, we might as well do the other side as well.
19:49
Speaker A
Okay, we did two. We did both of them. And to be honest, it looks pretty good.
19:55
Speaker A
It looks like a jet. This is really going to I'm glad we put these on cuz we were thinking of maybe not putting them on. Right, get this on there.
20:06
Speaker A
Let's put it on the car. Let's go. With those side skirts built up with the new Venom kit on it, we can now attach it back to the rear quarter. And it's starting to come together now. Once that's on, me and Liam are going to hang
20:19
Speaker A
it back onto the car and just apply a few bolts because all of this will have to come back off again to perfect all the fitment. Let's see what it looks like.
20:30
Speaker A
But that has made a huge difference to the look of the car. That it makes the wheel look so small, doesn't it?
20:42
Speaker A
That is going to look mental. I want to put all the other panels on.
20:46
Speaker A
Yeah, that's your nose lift up. This is like a show car. Like you driving this around Miami where you're pulling into the petrol stations and there's like that massive lit. This is just going to get hammered.
21:00
Speaker A
That looks insane. All the last little finishing bits will make it. So like obviously we're going to put we'll put a grill in here so it's not just an open space. So we'll put a grill in there.
21:12
Speaker A
That actually looks really good. I love that color. Yeah. Do we keep that that color?
21:25
Speaker A
It's very standouty, isn't it? Like your eyes are drawn to it. Okay, now that we know how to do that side, let's get this side on. And then I really, really need to see this rear spoiler because I'm not convinced.
21:52
Speaker A
Some of you might not be convinced either, but this is a one of one. This is literally history in the making. And if you followed the journey up to here, now's a great time to subscribe because now we're about to blast this out. Let's
22:05
Speaker A
go. What's your favorite moment in history? I I will have to say my daughter.
22:11
Speaker A
What do you think? Yeah, I agree. Time to do the other side. Now, remember, regardless of what we do to this car, it's always going to be scarred by the car vertical report. And all anyone will have to do is put the
22:28
Speaker A
VIN number into car vertical, and you can see the full history of the car.
22:32
Speaker A
You'll be able to see that it's got a salvage title and when it got it. I can also see the mileage history and every time it's been listed for sale or had a title change. On top of that, I can see
22:43
Speaker A
the full spec of the car. And this really helps if one of you are going out to buy a car you don't know too much about. Another really handy thing is that if the car does show up as damaged,
22:54
Speaker A
sometimes it'll even show you photos of the car when it was auctioned off at the car crash auction site. That way you can pinpoint exactly where the damage was.
23:02
Speaker A
Even if you believe your car to be completely clean, it's always worth checking it out on Car Vertical just in case you've missed anything. And you can do that by clicking the link in the description box below and then use my
23:13
Speaker A
discount code Matt to save some money on the check. That side's on. There is a replacement rear spoiler to the Pure Sport. But we're going to see whether this is now in the right place between one another before we go anywhere.
23:26
Speaker A
Because if this is too wide because this was designed using a regular Chiron. So we don't know whether the arches are different. I don't know. Or also make sure the height is different. The height is the same because if we fitted that
23:40
Speaker A
arch too low down and that arch too high up, then it could just look like it's doing that. So let's see what this is going to look like. Now when we lined the new wing up, the good news is that
23:50
Speaker A
it did line up to the bolt holes on the wing end plates. And then we got a rough idea of where this wing was going to sit. But to fit it was going to take some work. So before we went any
24:01
Speaker A
further, we decided to fit standard wing plate at the bottom with the standard wing to see if it would line up with the body kit. And unfortunately for us, it didn't. The new wing with the Venom kit is wider and a slightly different shape.
24:14
Speaker A
So he thought the best bet now is to take the standard wing off its mounting bracket, then fit the new wing to the old mounting bracket. So, off comes the old wing. And you can see the way that
24:27
Speaker A
the wing fits in. It almost slides into place on these hooks each side. So, it looks like we're going to have to make something on the new wing in order for it to fit the exact same way as OEM,
24:38
Speaker A
which is going to take a bit of modification. Now, the body kit did come with a new wing mounting bracket, but as this was based on the standard Chiron, the fixes were completely different to the Purport. So, we're going to use the
24:50
Speaker A
standard mounting bracket. as we know that's going to fit the best. So, we're going to fit that back onto the car and then lift on the Venom wing and we can get a rough idea on how much modification we're going to need to make
25:03
Speaker A
this work. Right, we think this is our option. The wing, this is the wing that Venom have made, but obviously it doesn't fit to this, but it's going to be way easier to make this platform fit onto the wing.
25:21
Speaker A
You can see that it's uh like it's just completely different fitment at the minute, but I think we should be able to get a body guy uh to make recesses in that wing for that to fit on in the same way. Uh so
25:37
Speaker A
that should work. And at least we know they bolt to the end the end place.
25:45
Speaker A
It looks so like much wider. We need to get the front end on before we even like make a judgment on what this is going to look like. It's going to look crazy. It's meant to look mental. That's
25:58
Speaker A
what the whole idea of it is about. Let's put the engine cover on. And then finally, we're going to have to get to the front end and see if we can get the full picture of how this is going to
26:11
Speaker A
look. some modification needed then, but that's what you got to expect when you're fitting an aftermarket body kit.
26:18
Speaker A
Now, we can slide on the engine cover and sort of get a rough idea how the rear of this car is going to look. Next up is the front end.
26:26
Speaker A
Crazy. That looks sick. And you can already see combined with a bonnet, this is going to make a huge difference. Here it is sat next to the original front. What do you think?
26:41
Speaker A
I think it's going to look insane. We made the radiators and everything does all seem to be holding out here.
26:52
Speaker A
Everything has been good. Even Alex has been driving it and it's all held out pretty good. Ran to temperature, no problem. But now it's going to get the Well, it's going to come to the tricky part. We needed a front end. And that's
27:05
Speaker A
where we contacted Venom and see if they could replicate the new front end. But of course, they wanted to go one extra and make it wider than the standard Chiron. And and at this point, we might as well make it look different because
27:17
Speaker A
if we try and make it look original, I just feel like it's never going to look original. Like no matter a copy is never going to be better than the original.
27:27
Speaker A
So, we might as well make it better by making it wider. And that's exactly what Venom have done. So, bring out the body kit.
27:39
Speaker A
Here's the moment then we've been waiting for for months. A completely handbuilt front end for the Bugatti Chiron.
27:50
Speaker A
This is going to look absolutely crazy. But on top of that, remember there's always going to be little things like people are going to be watching this thinking, "Oh, it's not going to be perfect." It isn't going to be perfect
27:59
Speaker A
at yet. We just want to get the car back on the road and get this body kit fitted. So, it is all one car. There's going to be little tiny things that we're going to need. For example, like
28:08
Speaker A
the filler hole in the washer fluid. We still need to gas the air con and this heat is so hot. And at the minute, we've not really prioritized that because we don't even have a wind screen yet.
28:18
Speaker A
There's little bits of shrouding we need to make. There's a storage container on the front we need to make. We need to put the jumper cables in the correct spot. There's loads and loads of little things. But now, if we can make this
28:30
Speaker A
body kit fit and and fit right, whilst we're getting it painted, we can start doing all of the the smaller jobs to get this car working as it should and hopefully get it to top speed. This is going to go on first,
28:46
Speaker A
but as you seen when we taken the full front end off, you need to take this off to put the headlights in. So, before we fit these, headlights need to go in. And that was a whole other issue. When we
29:00
Speaker A
was assessing the damages of the Chiron, we did notice that both of the headlights had damage to them. But both of them did still work. So, we thought maybe there was a chance we could repair both of those headlights. That proved a
29:12
Speaker A
lot harder than we thought. Instead, I ended up looking for new ones. And some were listed for as much as $150,000.
29:20
Speaker A
And even Matty Rimac told us from Bugatti, they're not even that expensive. It's actually 25,000 per headlight. So 50,000 for the full um front system. Of course, we're unable to buy them from there. So where else do you go? We did find some listed on
29:36
Speaker A
Alibaba, but are you really going to trust those? And after a while of trying to source them, someone reached out from a country in Europe. Okay, we're on a very important mission. You know the mission is very important when this is
29:50
Speaker A
your transport. We are on our way to a secret location to meet a very secret person who can't be filmed and can't be named to pick up some Bugatti Chiron headlights for Alex's Bugatti. So, we're going to get on a plane, get to our
30:02
Speaker A
destination, try and film when we get there, then get back, get on to Matt, get on to Alex so they can finish the Chiron build in America. Let's go.
30:12
Speaker A
How has it ended up like this? A private jet to collect headlights. We land at 17:30. We need to leave by 1840.
30:23
Speaker A
So as soon as we land, we've only got an hour to get these headlights and get back to the airport.
30:30
Speaker A
Otherwise, the plane's going to leave without us. This is like something you see out of a movie. A special mission to collect some special parts. We've landed. We've got 1 hour to try and find this guy, get these
30:47
Speaker A
headlights, and get back on Earth. It's going to be tight. Let's go. All this way. 3 hours on the plane. Grab these headlights.
31:08
Speaker A
Look at these. Yeah, they look sick. Headlights secured. Literally right. Now we've got to get him halfway across the world.
31:34
Speaker A
And the best part about this, these headlights were €10,000. Cheaper than anywhere we've seen them before.
31:42
Speaker A
Got it. We're back in the UK. We've got the Bugatti headlights. So far so good. No damage. Let's get these to America.
31:54
Speaker A
And of course, they made it all the way to Miami. Original Bugatti Chiron headlights. I don't know how we've got them. I think it's one of them don't ask questions job. I really hope these work. I'm going to plug them
32:10
Speaker A
in because really these have got to be fitted to the body panels first, then you slide them on. But I just want to see whether they work first cuz if it needs coding or anything, we've had it.
32:21
Speaker A
But so far, this car has been really good with that type of stuff. It runs and drives looking like that. Come on.
32:30
Speaker A
A sort of safety net about this is that we know Alex's headlights worked even though they were damaged. So, worst case, we'll have to strip the internals and fit them to our new headlights, which we've got. But let's just hope now
32:44
Speaker A
these work. Oh, good start. Let's see if all the rest lights up. Oh, yeah.
32:57
Speaker A
Yeah. Okay. The outside two are working. Yeah. Okay. Yeah. Pam. So, so no side lights. No.
33:09
Speaker A
Yeah. Indicator. So, just the actual headlights. The two the two the two lights on either end are working.
33:16
Speaker A
So, put the side lights on. Yeah, that's on. That's headlights on. Oh. H. What does the side lights look like?
33:29
Speaker A
The the squares. Oh, completely around the squares. Yeah. Yeah. Yeah. So, the actual lights are working, which makes the car legal to drive on the road, but the side lights aren't. Now, I know there is a module underneath the
33:44
Speaker A
headlights, which is specifically used for powering the daytime running lights. My next step would be to get the module out of these headlights and replace them with the one that were in Alex's. But right now, Alex's headlights aren't
33:56
Speaker A
here, so that's going to be a job for later. For now, I want to get these headlights fitted to the Venom front end. So, you have a mounting point on the bottom, one, you've got a mounting point on the side, two, and then you
34:09
Speaker A
have two on the top, so three, four. So, you have four mounting points. One of them goes through onto this bracket here. So, a bolt goes through there.
34:16
Speaker A
That's one. Then the rest are all mounted to the wing. So, when you go under here, so that's in place. And we only have, if you go around the other side, we've got a mounting point for this right hand side here. So, we're
34:30
Speaker A
going to remove that out. You can see our mounting point there that we'll have to drill out and put a thread in. So that will go in there. But as for the top two, which you have brackets coming
34:40
Speaker A
off the wings. Now, we've got the original wings and the brackets on them. But I'm just wondering now, is there a reason why Venom didn't put them on?
34:48
Speaker A
Because if there is, then we're really going to struggle to do that ourselves. But what I want to try and do is have a look at the original wings and see if we can cut off the brackets for them and
34:58
Speaker A
fit them to this. So then we can bolt the headlight properly into this kit. So I went to get the old front end and inspect these brackets which sit underneath the wing. You can see look the bit of carbon that's like stuck on.
35:14
Speaker A
If we can get that off, that would be amazing. Out comes the Dremel. And it's time to start trying to cut out this headlight bracket from the original wing.
35:27
Speaker A
Yes. And there we go. A nice bit of solid carbon that we can use to mount the headlights with. I've just got to take it off the other side as well now. And there we have it. Both brackets out. Now
35:41
Speaker A
I'm just going to see whether these brackets actually fit in the Venom body kit. And it looks like they're going to.
35:47
Speaker A
So the next step is to bolt the brackets to the headlights. And once they're bolted to them, I can slide them up into the wing to see where it all fit. Oh yeah, that's worked great. I'm well happy with that. That is worked so good.
36:00
Speaker A
We just need really strong bond to bond that up to there now. So, we can mark up where that goes. Bond that to it exactly how Bugatti would have done it. And we'll have a headlight bolted to the new
36:14
Speaker A
wing and quarters and all that type of stuff. I'm now using this two-piece panel bond to hopefully stick this mounting bracket to the top of the Venom kit. This is probably the same type of stuff that Bugatti would have used on
36:28
Speaker A
the standard wing. We're fitting the headlight in place with the bracket attached so we know we get it in the exact right position. Once we're happy with it, we'll unbolt the headlight from the bracket and leave the glue to set.
36:41
Speaker A
And whilst it's setting, Liam's drilling out some holes so we can insert a riv nut into the existing mounting point that Venom have already put there for us. And there's one thread inserted.
36:52
Speaker A
We've just got to do the exact same on the left hand side. And once the glue's set, we can then lift the headlight into place, put all the bolts in, and see how it sits. And that's pretty good.
37:06
Speaker A
That is looking pretty damn good. And to be fair, I don't think we've done too bad of a job. Both headlights are now sat inside the front end of the new Venom kit. Get in there.
37:23
Speaker A
Oh yeah. Yeah. Yeah. Yeah. Yeah. That looks really good. That does look really good.
37:33
Speaker A
The headlights have just brought it to life, ain't they? Mhm. Proper brought it to life.
37:39
Speaker A
Try rest it in. Yeah. I want to lift it on. Come on. Let's see what this looks like. Time to fit the front end to the Bugatti Chiron.
37:47
Speaker A
First thing we needed to do is remove the wheels. And then we realized we had to remove the headlights to slide it over it. And we also didn't want to damage them in the process. Now we was going to find out how this Venom kit all
37:59
Speaker A
lines up to the Bugatti chassis, which was a little bit worrying being that Bob had to make a lot of the front end himself. So he wasn't too sure whether everything was going to line up perfect.
38:10
Speaker A
But so far so good. Woohoo. That is going to look It's going to look There's no other Brietti is going to look like this.
38:20
Speaker A
It's hanging at the minute. It's absolutely hanging. But we're getting there. All them bolts in. Yeah.
38:28
Speaker A
Okay. I will put the wheels on cuz I just want to see what it looks like on the on the ground. I actually want to put it at ride height because I'm I that splitter ain't that's if if he crashed
38:37
Speaker A
it as it was. That splitter is getting crashed into the ground. Right. Let's get the wheels on. Lower it down. I'm excited to see what it looks like at ground.
38:52
Speaker A
Look how low that is. That That's coming off. It does look really good though, doesn't it?
39:01
Speaker A
It looks so sick. The transformation was unreal. But right now, the car's in its lowest setting, which is pretty damn low.
39:16
Speaker A
Next up, the bonnet. I'm skeptical of this because our hinges are crazy bent. Can't get new hinges. They don't come off any other car. So, I think we're going to have to get Bob to remake and rebend the hinges.
39:34
Speaker A
The latch as well, that's a bit bent and twisted, but I think that's just off a regular Volkswagen. So, I think we can order that. Let's see where Oh my god.
39:45
Speaker A
Let's see where it sits and then we can see how far off we are. The panel gaps is going to be one of the hardest things to adjust, especially when we have severely bent bonnet hinges. Guys, I've had a bit of a play round. This line is
40:02
Speaker A
looking very, very nice. But what I would like is to get it in a little bit further. There's adjuster screws on the inside and to adjust them. Obviously, I've got to have it all off and all back on again. I'm pretty confident to say
40:14
Speaker A
that we don't I don't think we need to trim anything off the kit. I'm really happy with it. On the other side, it is really hard to adjust because you you're not justing one panel, you're adjusting the whole front end. On this side, look,
40:26
Speaker A
the gap is a bit bigger, but I want to get that gap on that side. The same size, same gap on this side. I would just say this just needs to go in a bit more, which I can do. This is our bent
40:37
Speaker A
bonnet hinge here is hitting the panel at the minute. So, that will need to be adjusting. All this stuff takes a long time. Then the bonnet. Jason, we sit that down.
40:50
Speaker A
I don't think we're going to be too far off. We're not too far. It's And that is with insanely bent hinges. I think if we if we close that up a tiny bit there, we could get a nice gap in there. And
41:08
Speaker A
then the same for this side here. The the hinge just needs to be bent in the right position.
41:16
Speaker A
Close this up a bit by lifting the front. Just close it off to about there.
41:22
Speaker A
And I'm really happy with that. We've got a long way to go, but that is looking amazing. I really don't think we're too far off. And the car's come a hell of a long way since the day we
41:36
Speaker A
first saw it. This is definitely going to be oneofa-kind Bugatti Chiron purport. Now, let's address these headlights.
41:55
Speaker A
I'm ready. Right. Let's hope when we switch these modules over, this is going to work to the bench. So, we think the modules underneath the headlight are the reason why the daytime running lights aren't working. So, we're going to switch them both to see
42:15
Speaker A
if that works. And we really hope that they do work. At the minute, we do have legal lights, but we the daytime lights is what makes the shoe on. So, I'm going to switch these over. Hopefully, they work. Let's see. So, just to be safe,
42:27
Speaker A
we're going to switch both modules out. There's two on each headlight. We've now got Alex's old ones. There's three bolts to undo the module and then we can put the old one into the new headlights. And we're going to do the same on both
42:40
Speaker A
sides. Both modules out and the old modules back in. There's no reason now why these headlights shouldn't work unless there's some kind of internal fault with them. And that might be the reason we got these headlights a lot
42:54
Speaker A
cheaper than any of the other Shiron ones. But let's see. Headlights in. Now for the big moment.
43:04
Speaker A
Come on. Please. Should that. Come on. Yeah. Oh no. Oh, that's such a shame. We have We actually have headlights, working headlights, but no DRLs.
43:28
Speaker A
And the DRLs is what makes the car really, isn't it? Like that's the the shoe on's got that signature look with the squares. I'm just going to see if there's anything on the dashboard I can press, but that
43:40
Speaker A
should have come on with the key. I should have been able to press that on with the key. But it is road legal. It's road legal, but no DRLs. I think we're going to have to change over all these
43:49
Speaker A
modules. I just hope we don't have to split the headlight to do it. Whether we can get in through the back, I don't know.
43:56
Speaker A
I then spent a fair amount of time scrolling through the dashboard to see if I could activate the DRLs, but still nothing. And to be honest, I was running out of ideas.
44:10
Speaker A
Uh until Yeah. Oh, no rear lights at all. The rear quarter modules are not plugged in.
44:20
Speaker A
So, no lights. The rear quarter modules aren't plugged in. over there. Over by there. I wonder if they I wonder if they do to do the lighting.
44:31
Speaker A
These are the rear quarter modules that we removed when we was cutting up the quarters. They do control a lot of the lighting. That's going to do it.
44:39
Speaker A
Are you ready? Why these have anything to do with the side lights, I don't know, but it's worth a try.
44:47
Speaker A
I do remember we had to plug these in to get the brake light working. So, let's see if these will get the DRLs working.
44:54
Speaker A
two. This is it. This is going to work. Remember that they have they have something to do with the lights.
45:04
Speaker A
Yes, they're on. COME ON. WE DIDN'T GET SCAMMED. We didn't get scammed. I need to see it.
45:13
Speaker A
Yes. That is looking sick. They now work. We didn't get scammed. Sometimes these newer cars don't make much sense, but isn't it obvious? You've got to have the rear quarter modules plugged in for the side like somewhere. Oh, that is evil.
45:35
Speaker A
Right, the next thing to like before we commit to fully fitting this kit, painting it, getting everything right on it, it's going to be the wheels. This is going to be a tricky one. We said we needed these tires to do
45:51
Speaker A
top speed, but that means we need to keep the width of the wheel, but can we get a more aggressive offset on the wheel to make it fit the arch? Now, these wheels inside this Venom kit that come with the
46:05
Speaker A
Venom kit, we ordered and we weren't too sure about how they were going to look, but they are the same size as them. So, they're still 21 in. Apparently, the offset is different, but I don't know.
46:18
Speaker A
I'm still a little unsure about them. These are the wheels. I think they look okay. I don't think they look bad, but I think they need to be more crazy for this car. I think it needs a more standout wheel. Like putting black
46:35
Speaker A
wheels on this car, I think is criminal. Especially satin black. I think they need a color.
46:42
Speaker A
And I They look small. They do look really small. But to be honest, I don't think we've got much of a choice. If we want this car to go top speed, we're going to need these tires, which have a
46:55
Speaker A
width at the back of 355 mm. And right now, the rear wheel is 21 in. But no one makes a tire for a 22-in wheel 355 mm wide. So, our only option is to have the standard fitment, but give it a more
47:12
Speaker A
aggressive offset, which these wheels should have. uh changing the offset will move where you bolt it. So positive offset where the wheel bolts to the hub is going to be further this way. So more of the wheel is going to be inside the
47:25
Speaker A
arch. If you have negative offset, you're going to be going this way into the wheel. So more of the wheel is going to be on the outside. If you had zero offset, you're banging the middle. So a lot of people move that round, but you
47:38
Speaker A
can still keep the same barrel of the wheel. You're just moving around the offset and that will move the wheel depending on the fitment. So, we're hoping that the offset on this has gone a few more negatives to this way.
47:53
Speaker A
Let's find out. Right now, you can see the standard wheels sitting really far inside those extended arches, but they've got those tires on. We need to do that top speed. So, let's hope these Venom wheels sit pretty flush with the
48:08
Speaker A
new arches. Okay. So, obviously bearing in mind, there's no tires fitted to the wheels. So, there's obviously going to be tire each side of it.
48:18
Speaker A
And it's also got nose lift up. And also, the ramp isn't going to go all the way down. So, what we're just looking for here is just to see rough fitment.
48:27
Speaker A
But, I actually quite like the design. I just feel like they need to be bigger.
48:30
Speaker A
But, I don't know whether it's an optical illusion now because I haven't got the tires on them. Let's see the actual fitment.
48:43
Speaker A
I don't know how much better you're going to get than that. These wheels are actually sitting pretty flush with the arches now, but it's really hard to gauge what they're going to look like, especially without tires on and at this
48:54
Speaker A
height. I don't know if black wheels are going to be the right choice. It's so hard to judge from that. You're going to have to let us know in the comment section. Obviously, it's so far away from being complete at the minute. So,
49:07
Speaker A
everything you have to squint at, but we've got headlights on and we've got body panels on. We're getting there.
49:14
Speaker A
It's actually coming together. The wheels, I don't know. But it it's a nice worry to have. The fact that we're worrying about wheels at this stage rather than worrying about how we've going to fix something. Oh, this is a
49:26
Speaker A
tough one. It is a real real tough one cuz the wheels will make or break it, I guess. Thanks so much for watching this video. If you enjoyed it, hit the subscribe button, hit that thumbs up button, and in the next video, we need
49:37
Speaker A
to get make a hell of a lot more progress on this show, and we're that much closer to getting it back on the road. See you in the next video. Peace out.
49:56
Speaker A
normal like a truck. I just can't deny.
Topics:Bugatti Chironcar rebuildcustom bodykitVenom bodykitcar restorationluxury car repairdashboard fault fixairbag light fixexotic car modificationMiami workshop

Frequently Asked Questions

Why couldn't the team use original Bugatti parts for the rebuild?

Bugatti decided early on not to sell any parts for this crashed Chiron, citing safety concerns, so the team had to fabricate all body panels and headlights themselves.

What was the cause of the persistent airbag light on the dashboard?

The airbag light was caused by a fuse with a broken locking tab inside the battery fuse box. Replacing the fuse's locking tab with one from a Mercedes Vito van resolved the issue.

What makes the Venom bodykit special for this Bugatti Chiron?

The Venom bodykit is a $700,000 custom aerodynamic kit designed specifically for this one-of-a-kind crashed Chiron, making it unique and more aggressive than standard parts.

Get More with the Söz AI App

Transcribe recordings, audio files, and YouTube videos — with AI summaries, speaker detection, and unlimited transcriptions.

Or transcribe another YouTube video here →