Skip to content

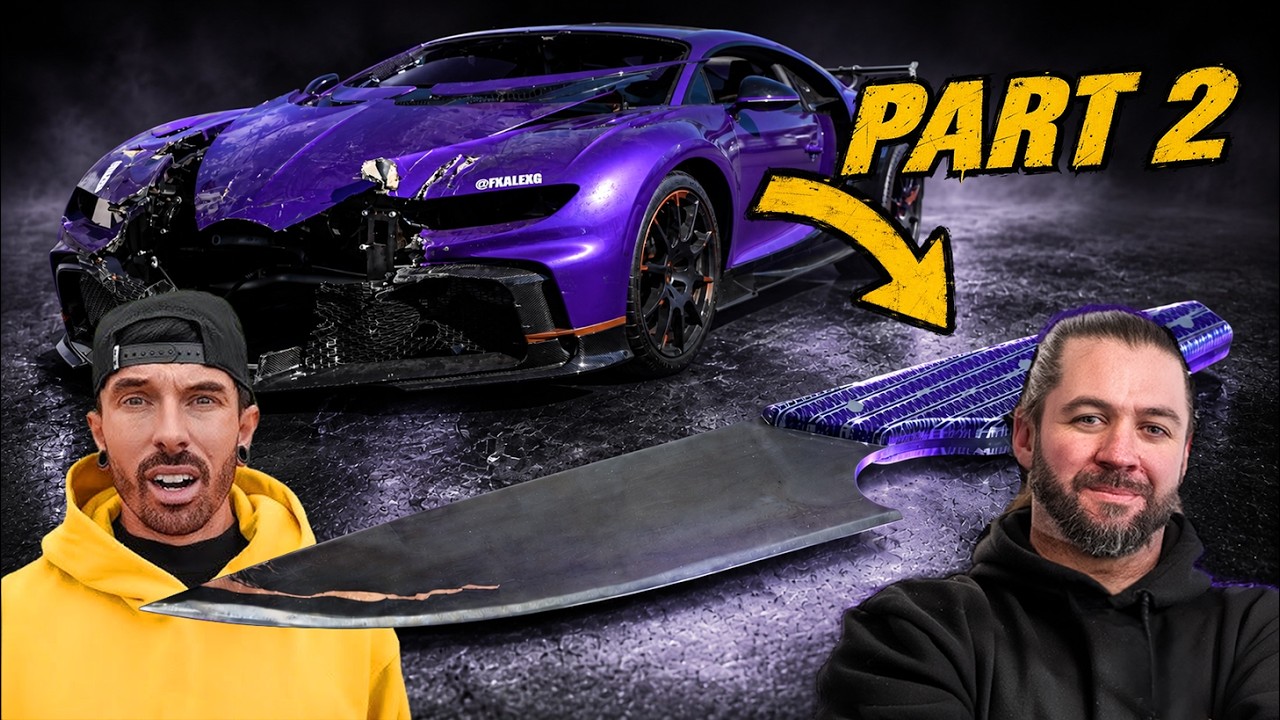
FINAL FIXES ON THE BUGATTI CHIRON WITHOUT A WELDER

Final repairs on a Bugatti Chiron using aluminum solder instead of welding, focusing on aircon pipes and brackets.

Ask about this video. Answers come from its transcript only — with the timestamp, so you can check them.

Generated from the transcript and can be wrong — check the timestamp.

Key Takeaways

  • Aluminum soldering can be a viable alternative to welding for delicate automotive repairs.
  • Proper heating technique is crucial for bending and soldering aluminum without damaging it.
  • OEM-level quality can be achieved with aftermarket parts and careful fabrication.
  • Sourcing specialized tools in the US can be challenging, requiring creative problem solving.
  • Pressure testing is essential to ensure the reliability of repaired aircon pipes.

What the video covers

  • The video documents final repair work on a Bugatti Chiron without using a welder due to voltage incompatibility and cost.
  • The main focus is on fixing damaged aircon pipes using aluminum solder and custom bending techniques.
  • The creator explains the challenges of sourcing tools and parts in the US, including the absence of a pipe bender.
  • A non-factory aftermarket dryer is fitted and integrated to maintain OEM standards as closely as possible.
  • The aluminum pipes are carefully bent using a map gas torch, with detailed explanation of heating techniques.
  • Soldering aluminum is demonstrated, emphasizing the importance of temperature control and cleaning for a strong joint.
  • The repaired pipes undergo pressure testing with air to ensure integrity before final installation.
  • Additional work includes fabricating and fitting unknown brackets and fuse board mounts.
  • The video highlights the commitment to replicating Bugatti’s original manufacturing methods without welding.
  • The creator encourages viewers to like and subscribe, expressing gratitude for their support.

Answers

Questions about this video

Why was welding not used for the Bugatti Chiron repairs?

Welding was not used because the welders the creator owns require 240 volts, which is standard in Europe but not available in the US where the repair took place. Additionally, the cost and limited scope of work made purchasing a new welder impractical.

How did the creator bend the aluminum pipes without a pipe bender?

The creator used a map gas torch to heat the aluminum pipes carefully, heating the outside face to allow stretching while keeping the inside cooler to compress. This technique allowed bending without specialized tools.

What method was used to join the aluminum pipes?

Aluminum soldering was used instead of welding. The process involved heating the pipes to the melting temperature of the solder rod, cleaning the surfaces thoroughly, and carefully applying solder to create strong joints.

Full Transcript — Download SRT & Markdown

00:01
Speaker A
Bob, we need you here right now. [music] [music] [music] We're back. We're back at the Chiron.
00:34
Speaker A
This time we're doing one of the last few little jobs that's left for me to do on this car. But we're going to do all of this without a welder. Now, we were going to bring over some welders that I
00:44
Speaker A
use, a brand called Ortech. They're my favorite brand, but they don't work over here because we use 240 volt over in Europe and here they use 110 volt. They just won't work. We were looking at a Ber welder to use here, but there's a few
00:58
Speaker A
grand and, you know, we've only got about, you know, a few hours of work to do. So, instead, we're going to use aluminium solder that I found on Amazon and see [music] if it works. Now, there's three jobs to do. One, copy this
01:10
Speaker A
bracket thing. Don't know what it does or where it goes. The second job is to make some more brackets for a fuse board that's held in the front of the car. And the third job is some of the aircon
01:20
Speaker A
pipes [music] that got damaged in the crash. Let's start with the hardest job, the aircon pipes. Now, it's not a massive job. It's just a few pipes, very small pipes as well, [music] but it is very important because the humidity and
01:31
Speaker A
the heat here in Florida is killer. So, uh, it's a really important part [music] for the car and for whoever's driving the car. During the crash, this piece here was sheared off clean and I had no way of attaching it on the last time I
01:43
Speaker A
was here. So, I brought it back to the UK. I fixed it at the machine shop [music] and this is how I did it.
01:51
Speaker A
[music] I did it. And then this I got it from Harbor Freight and [music] it is just standard aluminium tubing. And this is what I'm going to make all the rest or copy all the rest of the aircon pipes with. Now
02:13
Speaker A
we do have a backup. We've got this rubber tube, which is an aircon [music] kit with a crimper for crimping the ends on, but it's not used anywhere else in the car. And we want to do Bugatti justice by doing everything as close to
02:27
Speaker A
OEM as we can. Before we can route the lines, we need to get everything in place, including this new dryer, which was also lost to the crash. Now, this isn't a factory one, 'cause as you know, [music] it is impossible to get parts
02:41
Speaker A
from Bugatti. So, we have to make this aftermarket one fit and make it look like it was always meant to be there.
02:57
Speaker A
[music] Okay. [music] So, we're cutting up all these fittings that came in the, uh, rubber pipe kit, uh, because we can solder these to the hard pipe that we're using. But before we solder anything, we have to get
03:39
Speaker A
everything like super, super clean. So, we remount the inside, then the fitting that we just cut up should go in there. So, that's not super snug, but we can give it a pinch with pliers and then the solder will work
03:51
Speaker A
nice. Slight bit of an angle down, across this way, up and over. We want to make it look quite deliberate looking like, um, these Bugatti ones [music] here.
04:02
Speaker A
It's all tight fitting, closely ran everywhere. Figure it out. Make it up as you go along.
04:10
Speaker A
I never do that. Do that sound. So, there's a lot of thread on this bit here because the shoulder on the inside of the fitting and if we cut that fitting down, then the shoulder we'll lose the shoulder and the fitting won't work
04:22
Speaker A
anymore. It won't hold gas. So, we just leave it as it is. It's a bit ugly, but I'll put this nut in it and it'll make it look deliberate.
04:33
Speaker A
See? Yeah, that's better. That's better. [laughter] So, the first bend we'll need is not quite a 90° at the bottom here. Uh, it's probably about not quite 90. We don't have a pipe bender, but we do have a little, uh, map
04:46
Speaker A
cast torch. Couldn't find a pipe bender anywhere. I was driving around for a day trying to find a pipe bender for this.
04:51
Speaker A
Just couldn't get one. Um, it's, it's weird trying to buy stuff in America. Not good at it yet. I know that sounds silly, but like you go down to the local tool stores and they don't have the tools.
05:02
Speaker A
I don't know if you have to order in or any couldn't find one, so we'll figure it out. So, when you're heating aluminium with a blowtorch, aluminium does not change color when it's about to turn to a liquid, but it does give us
05:12
Speaker A
some clues when it's about to turn to a liquid. And what it does when the blue flame hits the aluminium, just before it turns to a liquid, it starts to give off a bright emission or an orange color
05:22
Speaker A
emission off it. So, the exhausts are orange. Look at it. Look at this now.
05:30
Speaker A
See it starting to turn? That's the orange that I'm looking for. And you've got two or three seconds of that orange before it starts to turn to a liquid.
05:40
Speaker A
See it go there. So when it reaches that liquid state, it's absolutely useless to us. We can't bend it. We can't form it. Ah, it's really hot. Uh, once it's seen that, it's just, you know, throw it in the
05:52
Speaker A
bin, start [music] again. Let's see if you can see the orange emission in what I'm about to do next. So, the trick to bend an aluminum pipe is to heat the outside face and keep the inside face slightly cooler because the outside
06:04
Speaker A
needs to stretch while the inside is under compression. And with an even amount of pressure, you can see it start to take shape. This tube is far too long. So, let's cut off what we don't need.
06:21
Speaker A
[music] [music] With a few bends done, it's starting to take shape. We're trying to make this look as close to the original as possible and following what would have been the same processes as Bugatti used.
06:38
Speaker A
That's one pipe down and one to go. Good job, sir. Good job. Take notes, Bugatti.
06:47
Speaker A
Now it's time to aluminium solder. And this is something that's only ever failed on me in the past, but this time it has to work. We need to bring the aluminium up to the melting temperature of the rod, which is that orange flame
06:59
Speaker A
that we were looking at earlier. [music] So, there's one suspect area. [music] I'm still getting used to this stuff, but it just looks like there's a little bit of crud there. So, I'm going to clean all the flux off and then remelt
07:15
Speaker A
it, reseat it, and it'll be fine. It'll be fine. It's got it. I'm happy with this. I just need to clean it now 'cause I got a big blob. Blob is good. Means it flowed where it should be. Just need to clean
07:37
Speaker A
it now. You say I need to clean it. I think you need to clean it. And just in case I didn't tell you, I need to clean it. A hand file and a wire brush is perfect for this. And it's all I
07:46
Speaker A
have. [music] Well, it's good. I'm happy. I'm getting the hang of it now. Have we addressed why we're not welding it? 'Cause we don't have a welder.
08:09
Speaker A
We don't have a welder. Plus, as you say, it is the way Bugatti would do.
08:14
Speaker A
It is how Bugatti have been doing it. So, so what we need to do now is actually like pressure test it.
08:18
Speaker A
Yep. [clears throat] Pressure test it with air. Not a vacuum 'cause vacuum pressure testing sucks.
08:26
Speaker A
That's the first bit of the first job done. Uh, going to fit this back in the car now. Um, I could probably leave all the cleaning until the last, but I'm just getting obsessed with it now. And then we're going to do the second half
08:37
Speaker A
of the run with even more complicated bends. With that done, it's onto the other end and it needs to connect to this. [music] We're using the old end of the fitting and we're soldering onto the new pipe. It's only a short route, but
08:48
Speaker A
it's a very tricky one and it takes a long time to navigate through all the other parts that are on the car. [music] [music] That's what happens when it gets too hot. So, I had too much orange.
09:20
Speaker A
Thankfully, this one is fixable. We'll have to create a patch once the rest of the pipe work is sorted.
09:27
Speaker A
So, where I overheated it with the torch and cracked it, I've put a little patch on it and I'm going to weld a patch to the, uh, to the pipe.
09:45
Speaker A
The repair is done and this pipe work is starting to look complete. Just the last little bit of soldering to do before we move on to the next job.
10:14
Speaker A
[music] [music] Hey. [music] Okay, that's all the lines done. Just need to pressure test them now. And the tool we need for this is an aircon filling machine.
10:37
Speaker A
Refrigerant and what kind of refrigerant to purchase. And to figu
10:42
Speaker A
You can actually see it's right here. Usually the sticker is found right in the front on this piece of metal right here or the plastic trim that covers the metal. The other place you can find it, this is an aircon filler machine. I've
10:53
Speaker A
never used one before. Uh, but the lads are going to guide me through it. First thing we need to do is pull up vacuum. So, we've got a little vacuum machine on the ground there and it sucks all the air and all the other
11:02
Speaker A
stuff out of the out of the uh system. And if it loses the vacuum while it's under test that shows that we've got a leak in the work that I've done [music] and I need to try and find that leak,
11:12
Speaker A
but I'm confident that we don't have any leaks. So, we're going to pull the vacuum and then we're going to step two where we put the gas in. First thing we need to do is hook it up to the car and
11:21
Speaker A
pull Matt to safety. [laughter] I didn't think it was going to go here. Oh, it's Hopefully, it's [music] out of this and it's just a seal or something, but it sounds like it's not damaged at the back. Yeah,
11:38
Speaker A
it sounds like it's coming from in there. And thankfully, it was just a seal. Now, let's see if holds pressure.
11:47
Speaker A
So, that's a total success. Now, let's move on to the next job. Stop what you're doing. If you're watching this video, you're probably interested in car restorations and car modifications. If you're thinking of buying your own project to work on,
11:59
Speaker A
you've spotted something online and you want to find out a little bit more information about that car so you are not sold a lemon, you can go on to Carver Vertical. While we're out here in Miami, I thought we'd have a cheeky look
12:08
Speaker A
and see what supercars are available. For example, do you like Lamborghinis? I like Lamborghinis. So, this is the report from Car Vertical. It's showing one flag for damage, one flag for title check. So, it's showing that it's uh
12:20
Speaker A
it's got a junk title for possible past severe damage. So, you might not want to be buying that one. So, this is the sort of stuff that you want to be checking out for. And there's no money owed on
12:29
Speaker A
this thing either. And it's never been stolen. So, all pretty good things except the car is an absolute wreck. I will not be buying that one. So, I'll move on and I'll search the next car.
12:38
Speaker A
Car Vertical is the perfect way of making sure you're buying a good honest car. So, if you want to use this fantastic service, you can use my discount code, Matt. No, my discount code is Bob 20.
12:49
Speaker A
Bob 20 Bob 20 on your next car check. And I want to say an absolutely massive thank you to Carver Vertical for sponsoring this video. Now back to the Bugatti.
13:01
Speaker A
Now need to replicate this bracket out of that. Home Depot's finest bit of angle material. I'm thinking I might be able to like copy the sides, trim it down, weld it. We got Well, I don't have a welder. I'm going to have to use that
13:17
Speaker A
solder stuff again. And then I don't I don't know. Usual me. Don't have a plan.
13:22
Speaker A
We'll make it work. So, thankfully, the one that was lost in the [music] crash is exactly the same as the one on the other side. First thing we do is cut the aluminium to size.
13:34
Speaker A
[music] This bit is 40 mm across the front. And these are 25 mil each. So, that means I need to take 10 mil off the inside of one of them. Grab a 10m spanner and then that'll scribe your line.
13:47
Speaker A
You're too clever sometimes. It's quite dangerous. Lazy. Now we can take that lazy line and cut it flush to the vice.
13:57
Speaker A
Follow me for more tips and tricks. [music] [music] And just like the aircon lines, we're going to solder this bracket together.
14:34
Speaker A
Do we do we do it? [music] So, how'd you feel not using a boulder?
14:58
Speaker A
Uh, I'd much prefer to have my welder in my comfort zone, but this is a challenge and I like challenges. I've never worked with this stuff before. Seems to be doing all right. A lot stronger than I thought it would be.
15:15
Speaker A
[music] Uh, so I've copied the sides. The sides are the correct height now. And then I've copied these little arms coming up there like that. And now I just need to copy this shape [music] onto there. And then flat it all down and clean it and
15:41
Speaker A
make it look good cuz it looks a bit janky at the moment. But that usually it's usually like that when we're making stuff anyway. So be ready. Like anything you do, it's the final stages that make all the difference. And with the end in
15:53
Speaker A
sight, these the last few bits and pieces, that means the end of the car is in sight. There's anger grinder here the whole time. [laughter] [music] [music] That's the aircon pipes all done now.
16:27
Speaker A
And the bracket is built for the front. I don't know what the bracket does, but it made Now the next thing I need to do is make some brackets for this. Now, there's no obvious way that this used to
16:37
Speaker A
bolt on. I'm not sure. Something was on the back here and got smashed up. We don't have it, but I need to invent something [music] that will hold it like this or utilizing the old bolt holes that are already
16:48
Speaker A
there. But nothing [music] seems to I I need this whole fuse box thing to move down this way so I can get to the bolt hole behind it. But as usual, don't have a plan. We'll figure it out. So, a trip
16:57
Speaker A
to Home Depot, then we can get to work on this final bracket. ASMR with Bob.
17:14
Speaker A
First thing we need to do is create a bend on one side that will mimic the mountain points on the Bugatti. It's really important we get the angles correct or it'll just look weird.
17:41
Speaker A
So, why are you doing those holes? Because when we put the Mansori glue on the back of the uh fuse [music] boxy thing, it will be like what Bugatti do when they're gluing stuff onto stuff.
17:51
Speaker A
The glue squidges [music] through and then kind of makes a little mushroom on that side and then it works.
17:57
Speaker A
So, like that, but instead of French, Irish. And that's the [music] final bracket done. This will go on here.
18:06
Speaker A
It'll slot onto the back there. Bolt through [music] here. [music] And then you use Mansori glue to hold that on there. We say Mansori [music] glue, but it's actually this two-part epoxy glue that will be absolutely solid once it's cured.
18:41
Speaker A
[music] I've just glued the pliers to the Betty. [laughter] Oopsie. There you go. Exactly.
18:53
Speaker A
She's going nowhere. That's everything that we needed to do. We fixed this front brackety thing. I don't know what it's called. We fixed the aircon pipes.
19:01
Speaker A
Well, we made new aircon pipes. We've made a new aircom pipe for there. We fitted the little condensy drainy thing.
19:07
Speaker A
I don't know what that does either, but I fixed it. Uh, and we've done the uh, fuse box mounty thing. I don't know what any of these names are. And we did it all without a welder and that was the
19:18
Speaker A
challenge and we've nailed it. So, I'm very happy. Now, there is one or two other bits and pieces that do need to be done on this car, but I absolutely need a welder for that. We do have a welder
19:27
Speaker A
coming in the next [music] few days, so we will be sorting them bits out, but that'll be in a future video. But for now, that's everything that we needed to do for Matt to get the front end on this
19:36
Speaker A
car and back on the road. As always, I really appreciate you watching. It genuinely does mean a lot to me and my cameraman. Uh, so thank you very much for watching and don't forget to like and subscribe and all the usual stuff.
19:49
Speaker A
So, I'll see you in the next video. Thank you. How you feeling? That was really difficult to come back in. I was kind of half swimming.
20:01
Speaker A
That was a fight. [laughter] All for the bit. Dedication to the bit. All right, got to drive back now.
20:10
Speaker A
Left my bag in the van.
Topics:Bugatti Chironaluminum solderingaircon pipe repaircar restorationautomotive fabricationDIY car repairBugatti repairaluminum pipe bendingaftermarket partspressure testing

Get More with the SozAI App

Transcribe recordings, audio files, and YouTube videos — with AI summaries, speaker detection, and unlimited transcriptions.

Or transcribe another YouTube video here →