Sampling Vocals in Beats (FL Studio TIP | THE BLUR) — Transcript

Learn the blur technique in FL Studio to sample vocals and create balanced beats using convolution reverb.

Key Takeaways

  • The blur technique helps make dense vocal samples usable in beats by reducing their presence without losing melody or rhythm.
  • Fruity Convolver in FL Studio is an effective tool for applying this technique, with key parameters to control the effect.
  • Using white noise as a reverb profile creates a unique ambient blur that can be shaped for creative vocal sampling.
  • This method allows quick creation of alternate beat versions (A and B sides) by switching the convolution reverb on and off.
  • Understanding and adjusting plugin settings like dry mix, stereo separation, and stretch is crucial for optimal results.

Summary

  • The video demonstrates a vocal sampling technique called the blur to create beats from dense vocal samples.
  • It explains how to reduce the presence of a vocal sample while maintaining melody and rhythm using convolution reverb.
  • FL Studio's Fruity Convolver plugin is used, with a free convolution reverb download provided for other DAWs.
  • Key plugin parameters such as dry mix, stereo separation, delay, self convolution, stretch, and EQ are explained in detail.
  • The stretch dial is highlighted as the most important control for timing the blurred sample close to the original.
  • Convolution reverb simulates different acoustic spaces, with presets like Church Far and Bathroom demonstrated.
  • The blur white preset uses a white noise reverb profile to create a large ambient effect that can be shaped with an envelope.
  • Instructions are given on how to mimic the blur effect if a convolution reverb lacks the white noise preset.
  • The technique can be used to easily create A and B sides by toggling the convolution reverb and adjusting instrument layers.
  • Additional resources like the drum kit and white noise sample are available in the video description.

Full Transcript — Download SRT & Markdown

00:00
Speaker A
Today I'm going to be showing you guys a sampling technique called the blur, where you can take any vocal sample and pretty much instantly make a cool beat out of it.
00:09
Speaker A
What I did was I took this sample here.
00:15
Speaker A
And I use this technique to make this beat right here.
00:28
Speaker A
So although you can use this technique on any vocal sample really, it's especially useful whenever you have a sample that's just a little bit too dense to use as it is.
00:39
Speaker A
And the sample just takes up a little bit too much room to make a good beat out of it.
00:43
Speaker A
So for example, if I tried to make a beat out of the raw vocal loop as it is, this is how it'd sound.
00:50
Speaker A
So as you can hear, the sample just has way too much presence in the beat.
00:55
Speaker A
It's just going to be near impossible for an artist to use.
01:01
Speaker A
The thing is though, I really like the sample, I like the melody.
01:06
Speaker A
I like the texture of it, I like the rhythm.
01:10
Speaker A
And so the blurring technique that we're going to use is going to basically reduce the amount of presence that the sample has in the beat.
01:18
Speaker A
Meanwhile, it's going to maintain the things that we like about it, such as the melody and the rhythm.
01:24
Speaker A
So to do this technique, we're going to need a convolution reverb.
01:28
Speaker A
The good news is FL Studio actually comes with one.
01:33
Speaker A
But if you don't have one with your DAW, I've actually included a free download for one in the description box below.
01:40
Speaker A
All right, so now we go into FL and we select the channel that our vocal sample is on.
01:44
Speaker A
And we're going to insert a Fruity Convolver plugin on top.
01:49
Speaker A
And so now I'm going to go into the presets and select one of the options under the blur section here.
01:54
Speaker A
First, I'm going to play how it sounds with just the stock preset on top.
02:00
Speaker A
So as you guys can hear, it's just really ambient and a little bit too reverby for me.
02:06
Speaker A
So what we're going to try to do is bring back some of the presence into the sample.
02:10
Speaker A
There are only really a few dials that you have to worry about here.
02:16
Speaker A
But I'm going to walk through each and every one so you guys have an idea of what they actually do.
02:20
Speaker A
All right, first step is dry.
02:23
Speaker A
So what this does is it introduces the original sample back into the mix.
02:27
Speaker A
So this is useful if the sample now sounds a little bit too blurry, a little bit too reverbed out.
02:33
Speaker A
What we can do is just introduce a little bit more presence back into the sample.
02:38
Speaker A
So we have two stereo separation knobs here.
02:41
Speaker A
What we're more concerned about is the wet stereo separation.
02:44
Speaker A
Fundamentally, what this does is it controls whether it's going to play back in stereo or mono.
02:48
Speaker A
If your beat has a lot going on in it and it has a lot of layers playing, what I'd recommend doing is turning this to a more mono or merged setting.
02:55
Speaker A
So it takes up a little bit less room in the mix.
02:58
Speaker A
Or if you have a more spacey ambient type of beat, turning this left so the sample takes up more room in the beat would be a good idea.
03:05
Speaker A
So next step is delay.
03:07
Speaker A
What this is going to do is control how quickly the blurred version of our sample is going to play.
03:12
Speaker A
I would recommend keeping this down to zero because what this is going to do is throw off the timing of our vocal sample if we start increasing it.
03:19
Speaker A
Next step is self convolution.
03:21
Speaker A
I'd recommend turning that all the way down.
03:23
Speaker A
Basically, what this is going to do is stack a reverb on top of another reverb, which we don't need in this instance.
03:28
Speaker A
Now the stretch dial is probably the most important dial for this technique.
03:31
Speaker A
So turning the stretch all the way down to 50% here will help shape the blurred version of our sample to be as close of a mimic to the original sample in terms of overall timing.
03:38
Speaker A
So this is how it sounds if we completely stretch out the sample.
03:42
Speaker A
And this is how it sounds if we completely reduce the amount of stretch that we use for the sample.
03:47
Speaker A
So the EQ here is a little bit self-explanatory.
03:50
Speaker A
It sort of controls how much EQ we want in the shaping of the reverb.
03:54
Speaker A
If you go to the equalizer tab here, you can control basically what type of EQ you want for the output of the reverberation.
04:00
Speaker A
All right, so to quickly explain what convolution reverb actually is.
04:04
Speaker A
What it does is it basically mimics or simulates a unique space.
04:07
Speaker A
So for example, if we go into the presets, we can see we have a whole host of different types of environments that the convolution reverb is going to mimic.
04:13
Speaker A
So for example, if we select Church Far.
04:16
Speaker A
And we hit play.
04:18
Speaker A
What it's going to do is take whatever sample that we use this on and mimic that exact same type of reverb that we have here.
04:25
Speaker A
Whereas if we select something like bathroom.
04:28
Speaker A
It's going to sound a lot less reverby compared to our previous selection.
04:33
Speaker A
So what we're doing when we select the blur white preset is we're basically using a wall of white noise as the reverb profile.
04:39
Speaker A
So what this does is it creates a huge wall of reverb and we can then control and shape it based on the volume envelope as you can see here.
04:45
Speaker A
So what you can do if you have a convolution reverb that doesn't have this type of preset is you can just load up a whole bunch of white noise and use the envelope shaping tool that comes with it to mimic this type of shape here.
04:52
Speaker A
And if you don't have any white noise, I've included that in the description box below as well.
04:56
Speaker A
So another thing that's pretty useful with this technique is it allows you to make a B-side pretty easily.
05:00
Speaker A
What I do is I'll take the convolution reverb and completely turn it off and I'll introduce the original dense sample back into the song.
05:06
Speaker A
And I'll pretty much remove all of the instruments except for a couple.
05:10
Speaker A
And so this is a quick and easy way to create an A and a B side.
05:13
Speaker A
And then I reintroduce all the sounds back.
05:15
Speaker A
And put the convolution reverb back on and we have a quick and easy switch up.
05:19
Speaker A
And that is the blurring technique.
05:21
Speaker A
If you guys have found this technique useful or interesting, please leave a comment down below and let me know.
05:26
Speaker A
Also, the drum kit from this song is available in the description box below as well.
05:31
Speaker A
Please do subscribe and hit the like button.
05:34
Speaker A
And I'll see you guys next Tuesday.
Topics:vocal samplingFL Studioconvolution reverbmusic productionbeat makingFruity Convolverblur techniqueaudio mixingmusic tutorialvocal processing

Frequently Asked Questions

What is the blur technique in vocal sampling?

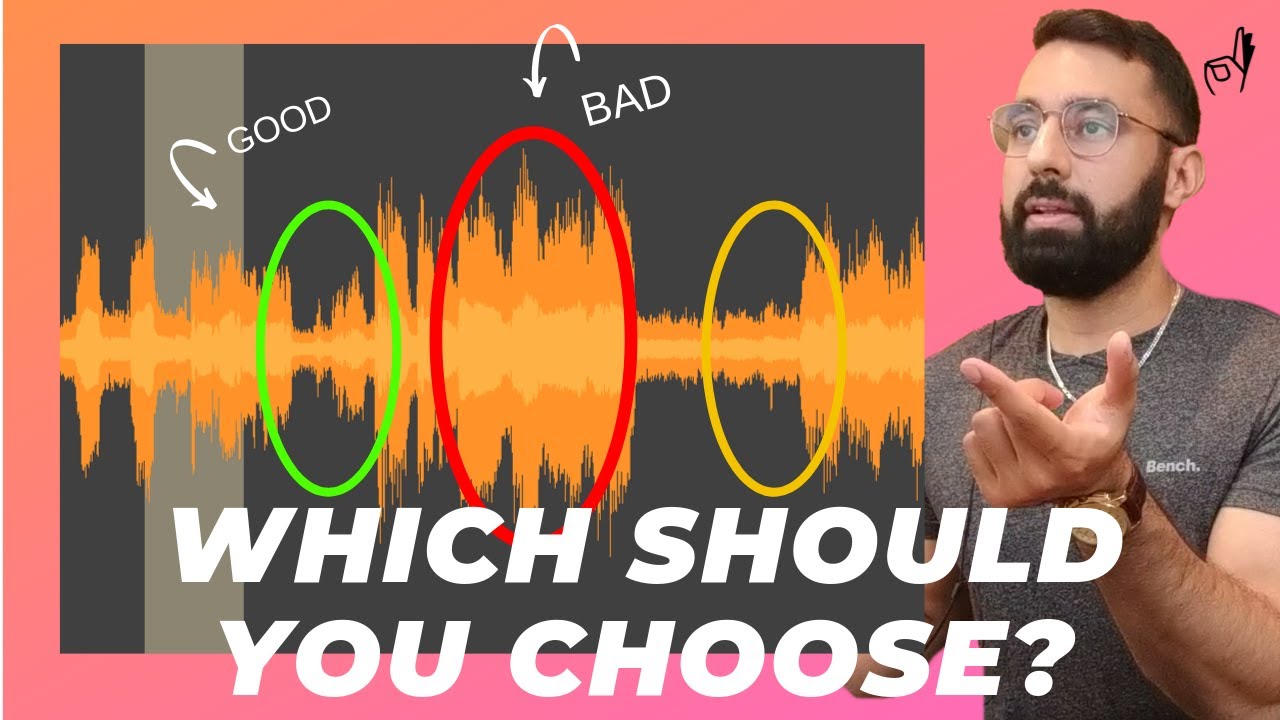
The blur technique uses convolution reverb to reduce the presence of a dense vocal sample while preserving its melody and rhythm, making it easier to use in beats.

Which plugin is recommended for the blur technique in FL Studio?

The Fruity Convolver plugin in FL Studio is recommended, as it includes presets and controls ideal for applying the blur effect.

How does the stretch dial affect the blur effect?

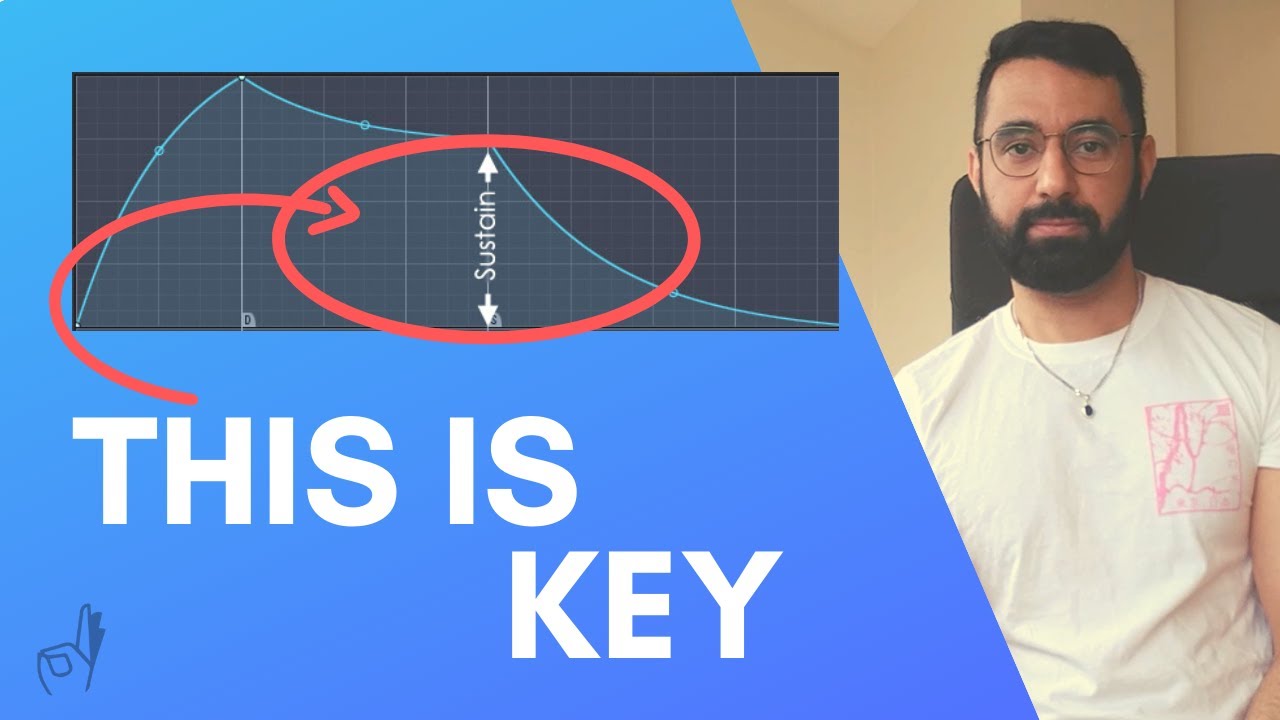
The stretch dial controls the timing of the blurred sample, helping it mimic the original sample’s rhythm and timing more closely.

Get More with the Söz AI App

Transcribe recordings, audio files, and YouTube videos — with AI summaries, speaker detection, and unlimited transcriptions.

Or transcribe another YouTube video here →